Value property. If the Value property does not contain data (or contains an empty array), the component will not display child
components. The data in the Value property is an array of objects. Each object in the array is the data of one Repeater row/column.
Let’s move on to a Repeater use case where we show how data is handled inside Repeater and how actions, validation, localization and
calculated fields are handled.
Repeater actions
You can use built-in actions to manage rows in Repeater. The following actions are available:addRow: adds a new row to Repeater.removeRow: removes the last row from Repeater.
addRow action
Use this action to add a new row to Repeater. The action has the following optional parameters:dataKey: Repeater’s data key in the form data. If the parameter is not specified, the action will try to find a Repeater that is parent to this component.rowData: data string (JSON) for the new row. If the parameter is not specified, an empty object will be used as data for the new row.index: index of the new row. If the parameter is not specified, the new row will be added to the end of Repeater.max: maximum number of rows in Repeater. If the parameter is not specified, the maximum number of rows is not limited.
removeRow action
dataKey: Repeater’s data key in the form data. If the parameter is not specified, the action will try to find a Repeater that is parent to this component.index: index of the row to be deleted. If no parameter is specified, the action will use the index from the parameters, see e.index or-1(last row).min: minimum number of rows in Repeater. If the parameter is not specified, the minimum number of rows is not limited.
Repeater example
Take a look at the form below, JSON below (you can upload this form to our demo to see how it works): For example, we will take a simplified hotel booking form. There are three elements of type Repeater in the form:- Rooms
- Names
- Children’s ages
- field for entering the date of booking
- fields for selecting room type (standard/suite)
- button for deleting the added room
- static element for displaying the selected room type
- buttons to increase/decrease the number of adults
- buttons to increase/decrease the number of children
- fields for selecting the age of children (if children are indicated)
- fields for entering the first and last name of adults
- button for validating the whole form
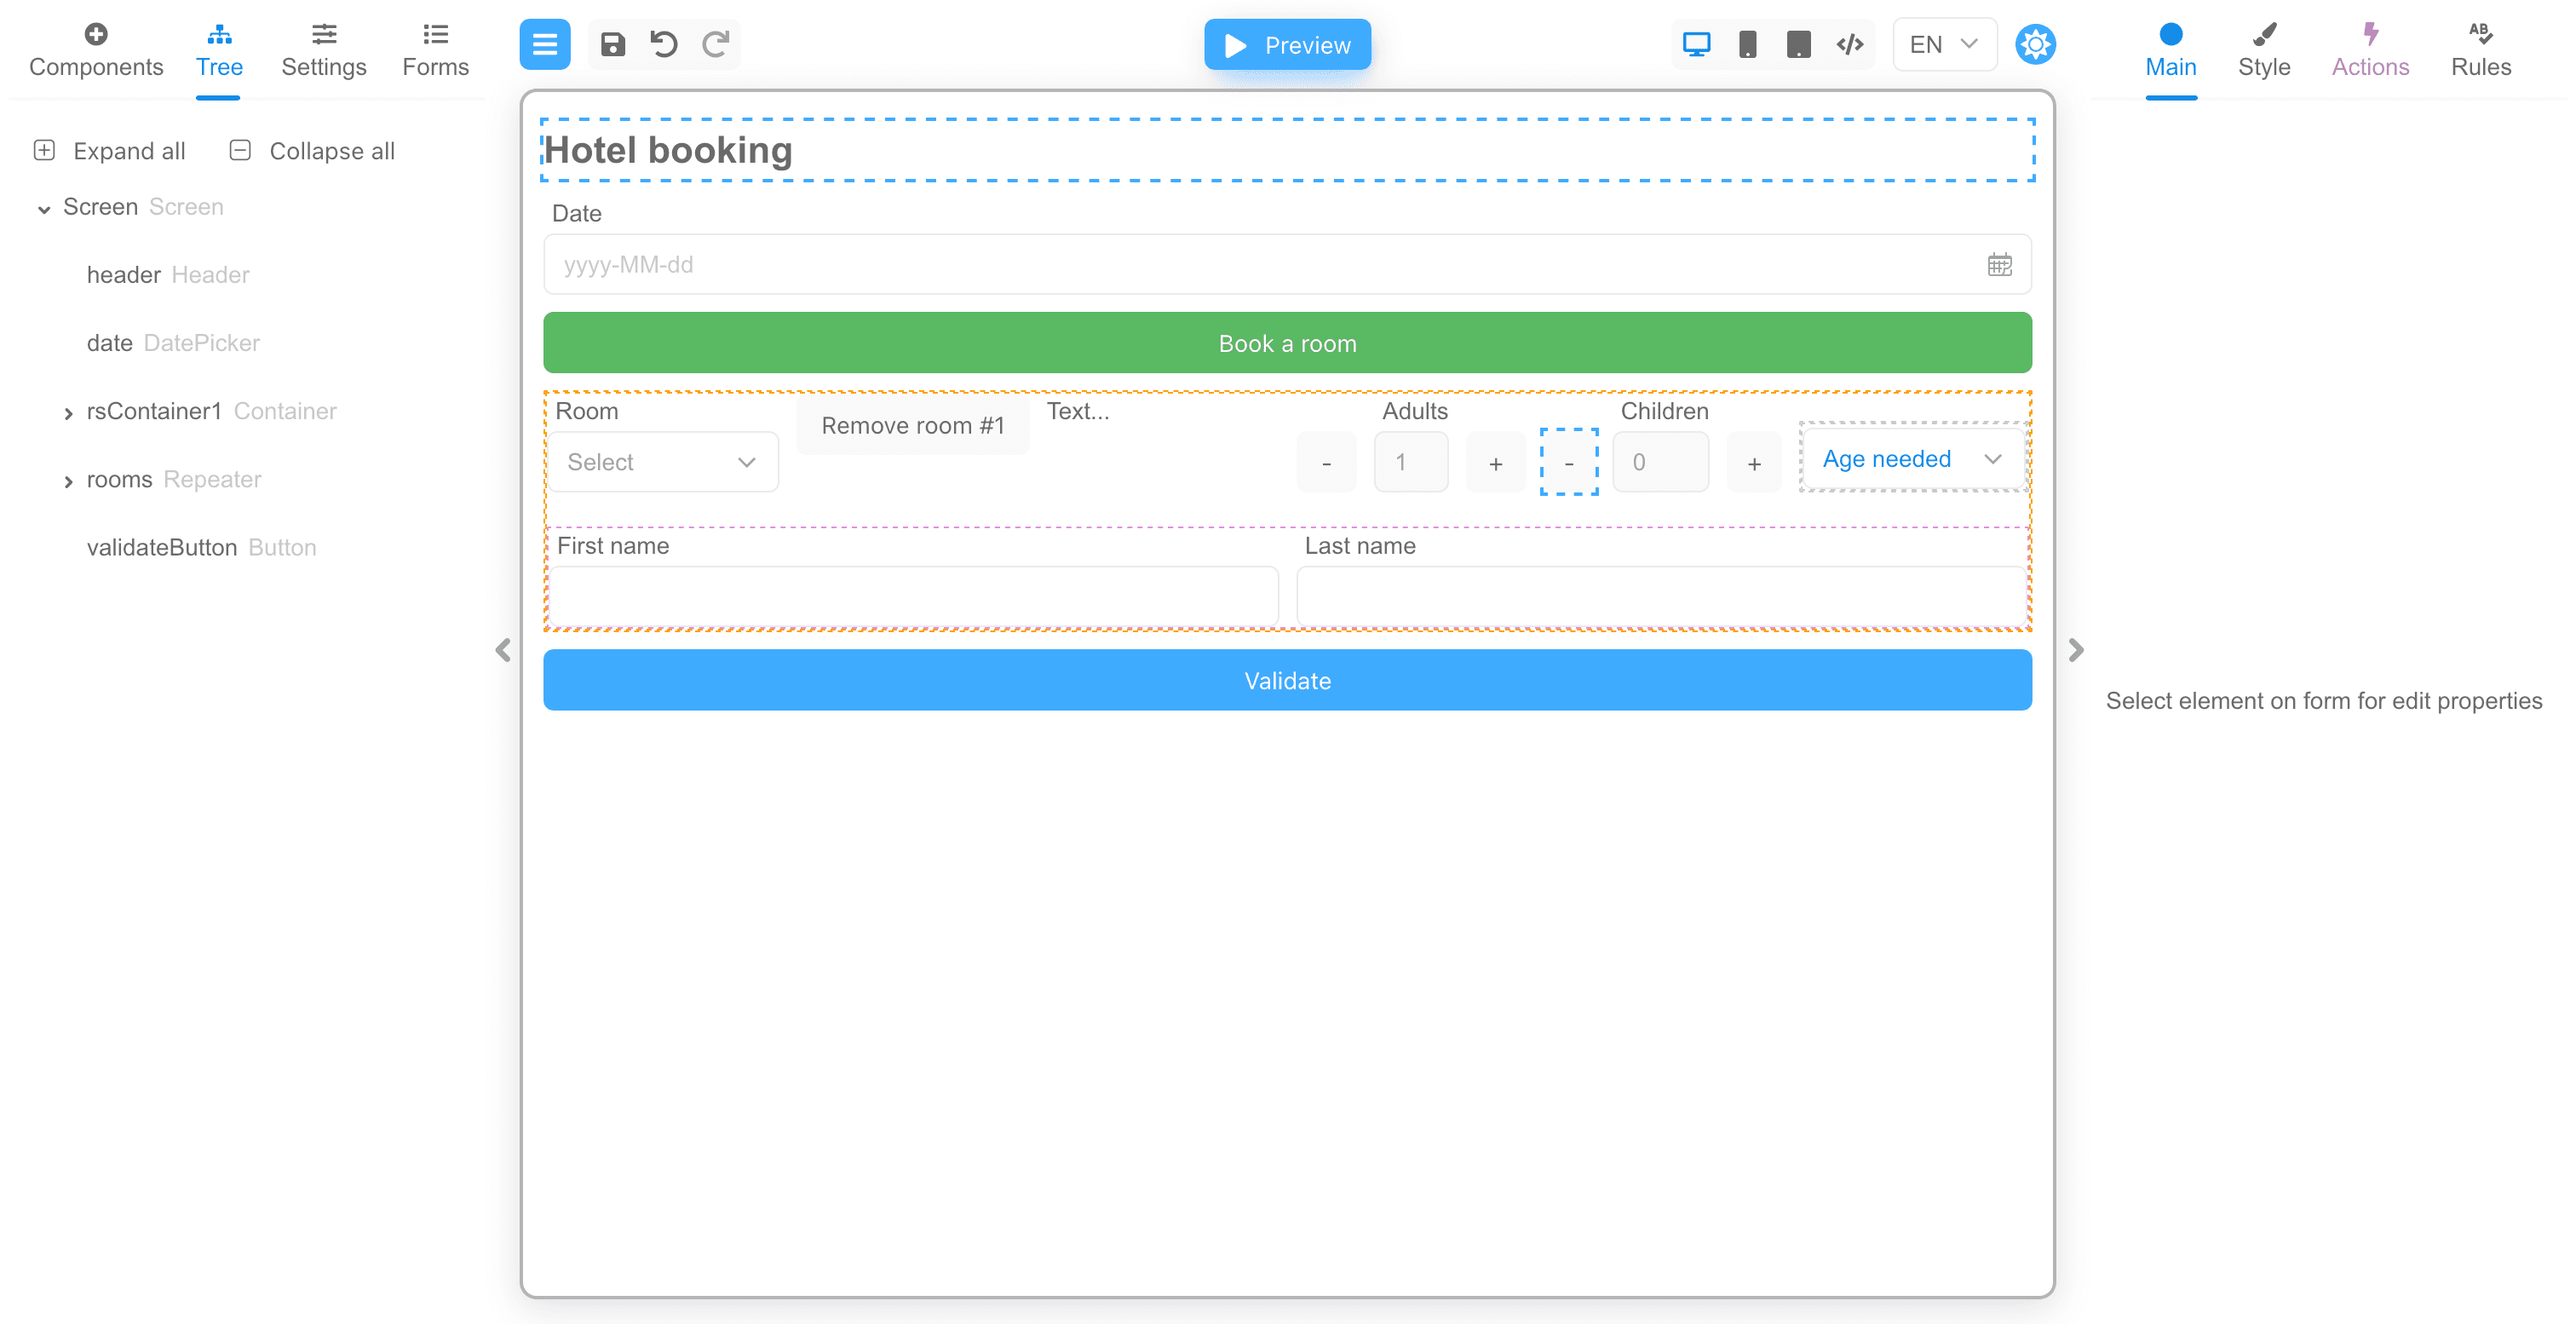
Explanation
When you work with the Repeater component in designer mode, it appears as a regular container on the screen. However, when you switch to view the form, things change. In this mode, the Repeater uses an array that is populated from theValue property (which is reflected in
the form data) and displays your components multiple times, depending on how many elements are in the array. By modifying the form data, you
can manipulate the number of items in the Repeater.
There is another important difference in the behavior of the components that are inside the Repeater. The data of these components is
isolated, as it were. You can think of a single Repeater element as one mini-form with its own data set.
Let’s look at how you can add and remove items in the Repeater.
Adding items to the Repeater
If we look at the “Book a room” button, then the ActionaddRepeaterElement is linked to this
button. This action has a fairly general code that can be used in other forms too. The action parameters name and max define the name of
the Repeater property in the form data and the maximum number of elements that can be added to the repeater, respectively.
The action code is pretty straightforward, it gets the current repeater data from the form data and then adds a new element to the data
array if the number of elements is lower than the maximum.
After changing the data, the Repeater component will automatically display the set of components on the form. In our case, a set of
components for booking a room will be added.
addRepeaterElement
plusAdultButton and plusChildButton buttons that increase the number of elements in the Repeaters to specify the names of residents
and specify the ages of children also use this action.
Removing items from the Repeater
Removing items from Repeater is similar to the add operation, you need to modify the array in the form data by removing items from the array. There is aremoveParentRepeaterItem action bound to the removeRoomButton to remove a room. This action has a name parameter that also
defines the name of the property in the form data that stores the Repeater data array.
The code of this action contains only a few lines, it basically just removes an element from the array in the form data by a certain key.
Pay attention to the features:
- The code operates on the data in e.parentData.
- The code uses the index from e.index.
removeParentRepeaterItem
e.data as the removeRepeaterElement
action on the minusAdultButton does.
removeRepeaterElement
Computed properties
In computed properties you have the same data available to you as in actions. For example, you can look at thechildAge component (the field for selecting the child’s age), which has the tooltip text set as a
calculated field.
childAge.Text tooltip text
- Date, found at the topmost level of the form
form.rootData.date. - The room type
form.parentData?.roomType, located in the Repeater element a level above. - The actual index of the component in the Repeater.
Validation
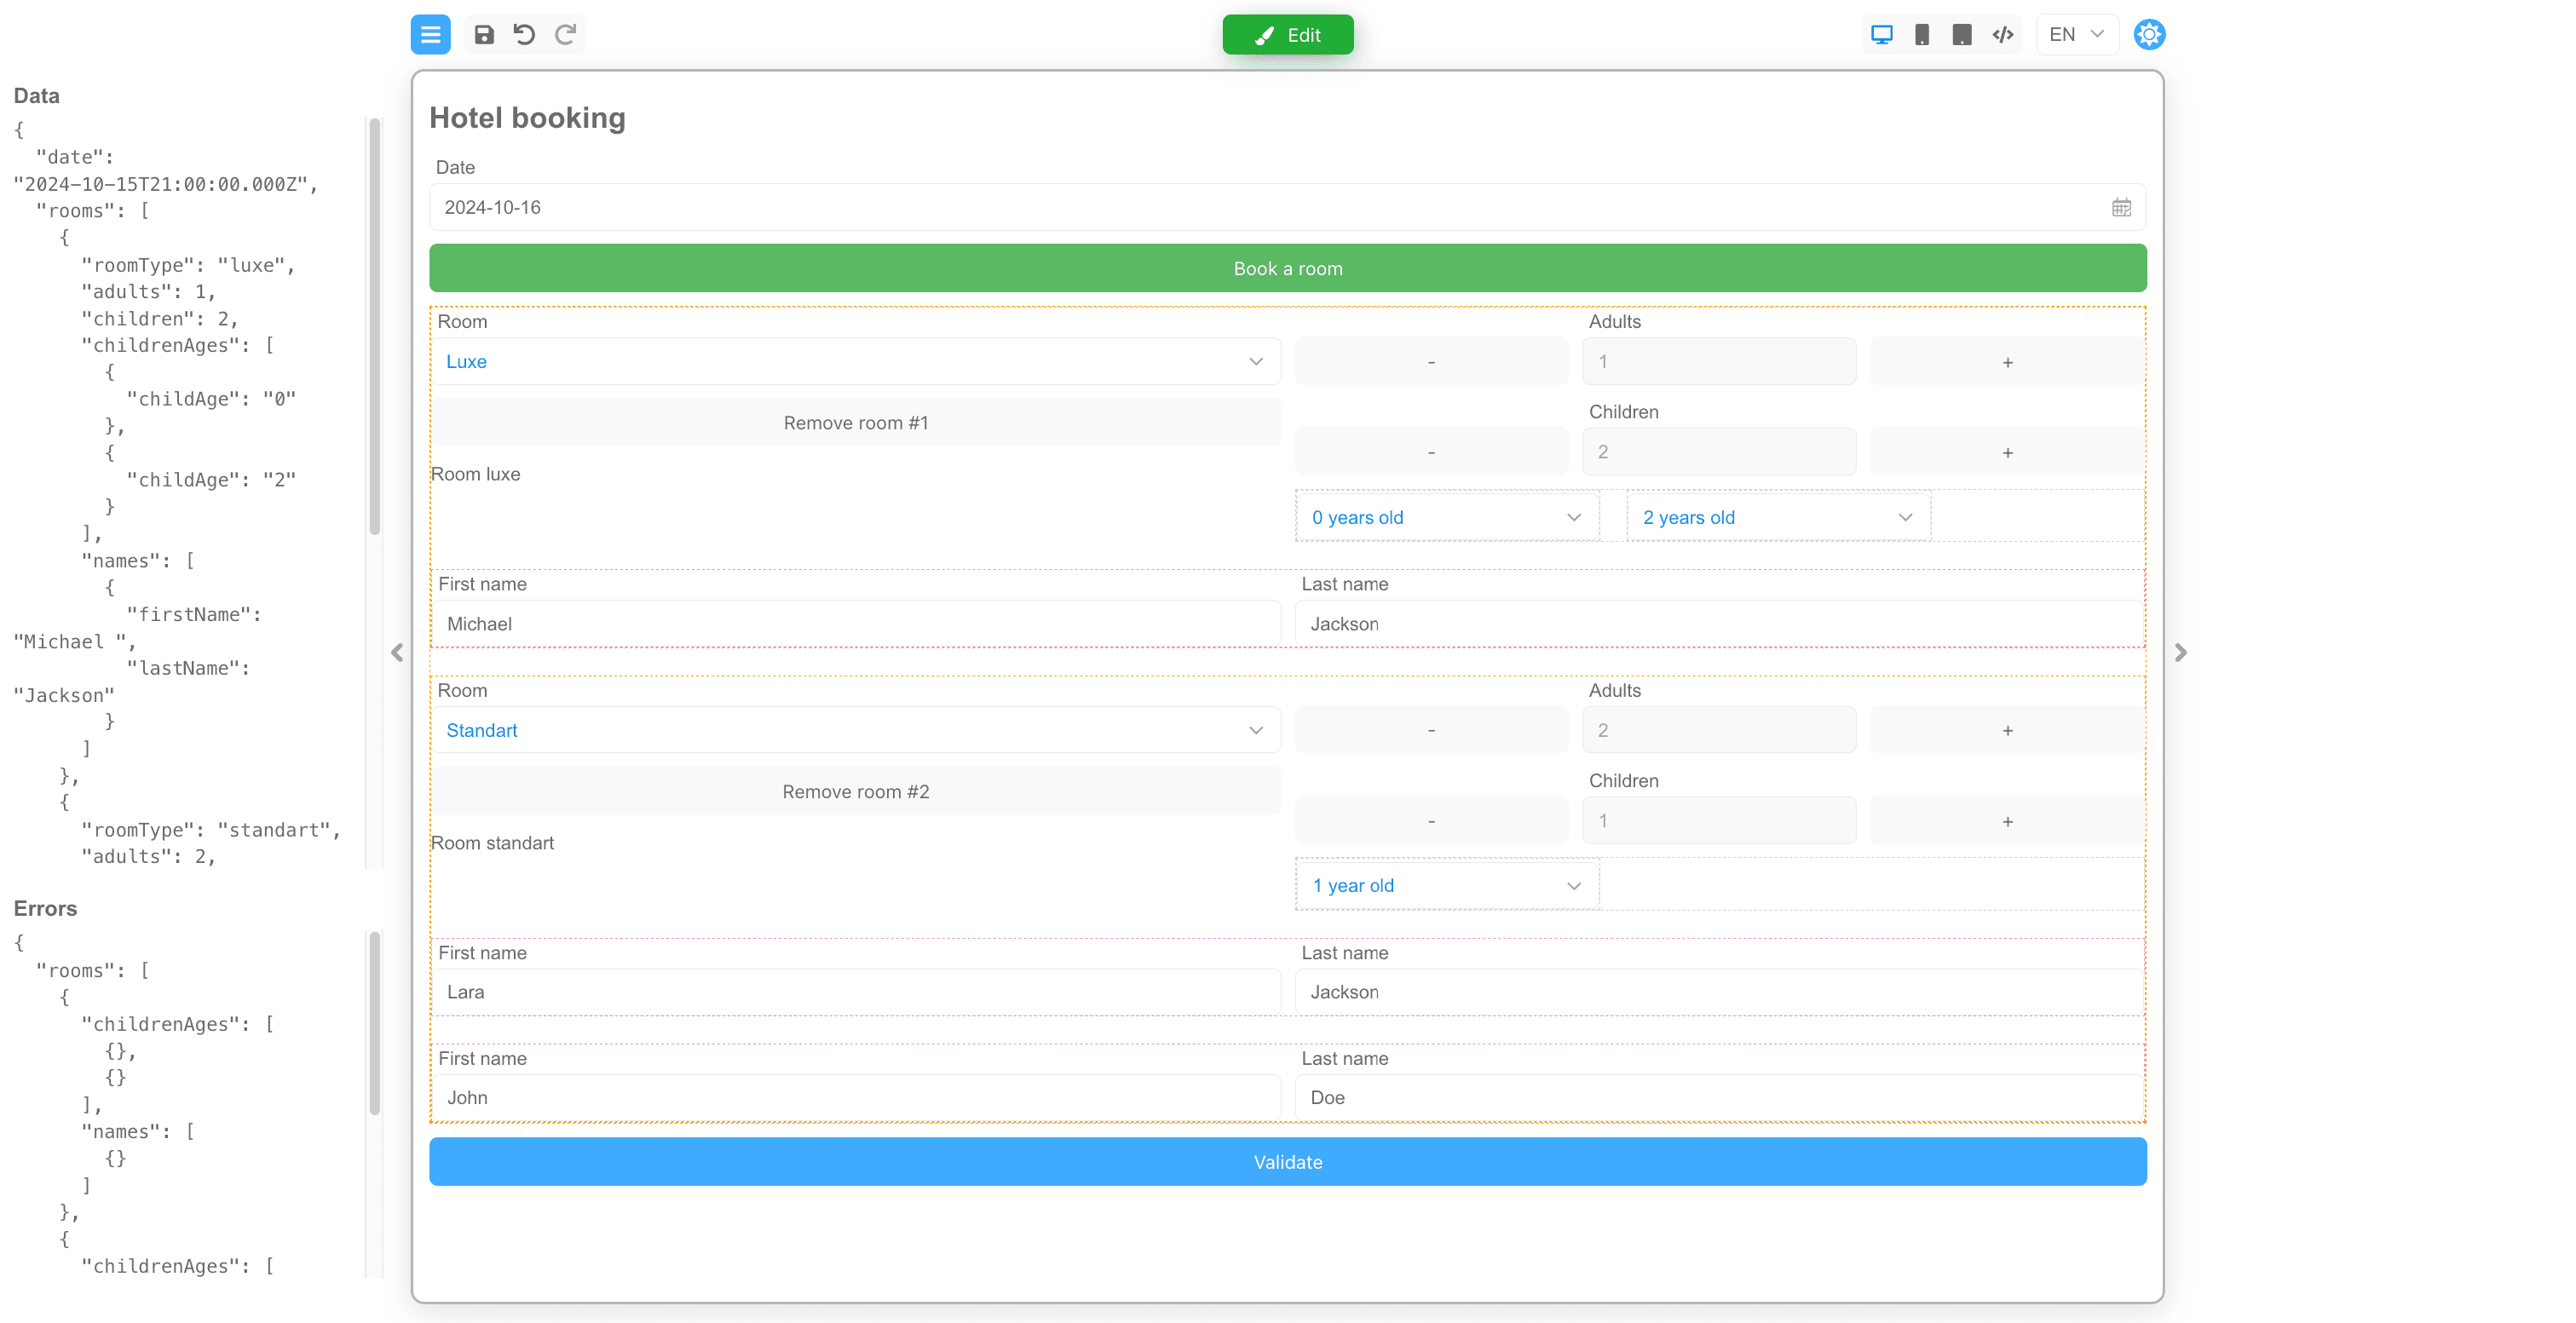
Validating the value of a component that is inside the Repeater is not different from normal validation. The validation function also operates on the value of the component. Validation messages can also be localized. The data of the components inside the Repeater will be organized into an array. Component validation errors will also be in the corresponding array elements. The following are examples.An example of JSON with data
An example of JSON with errors
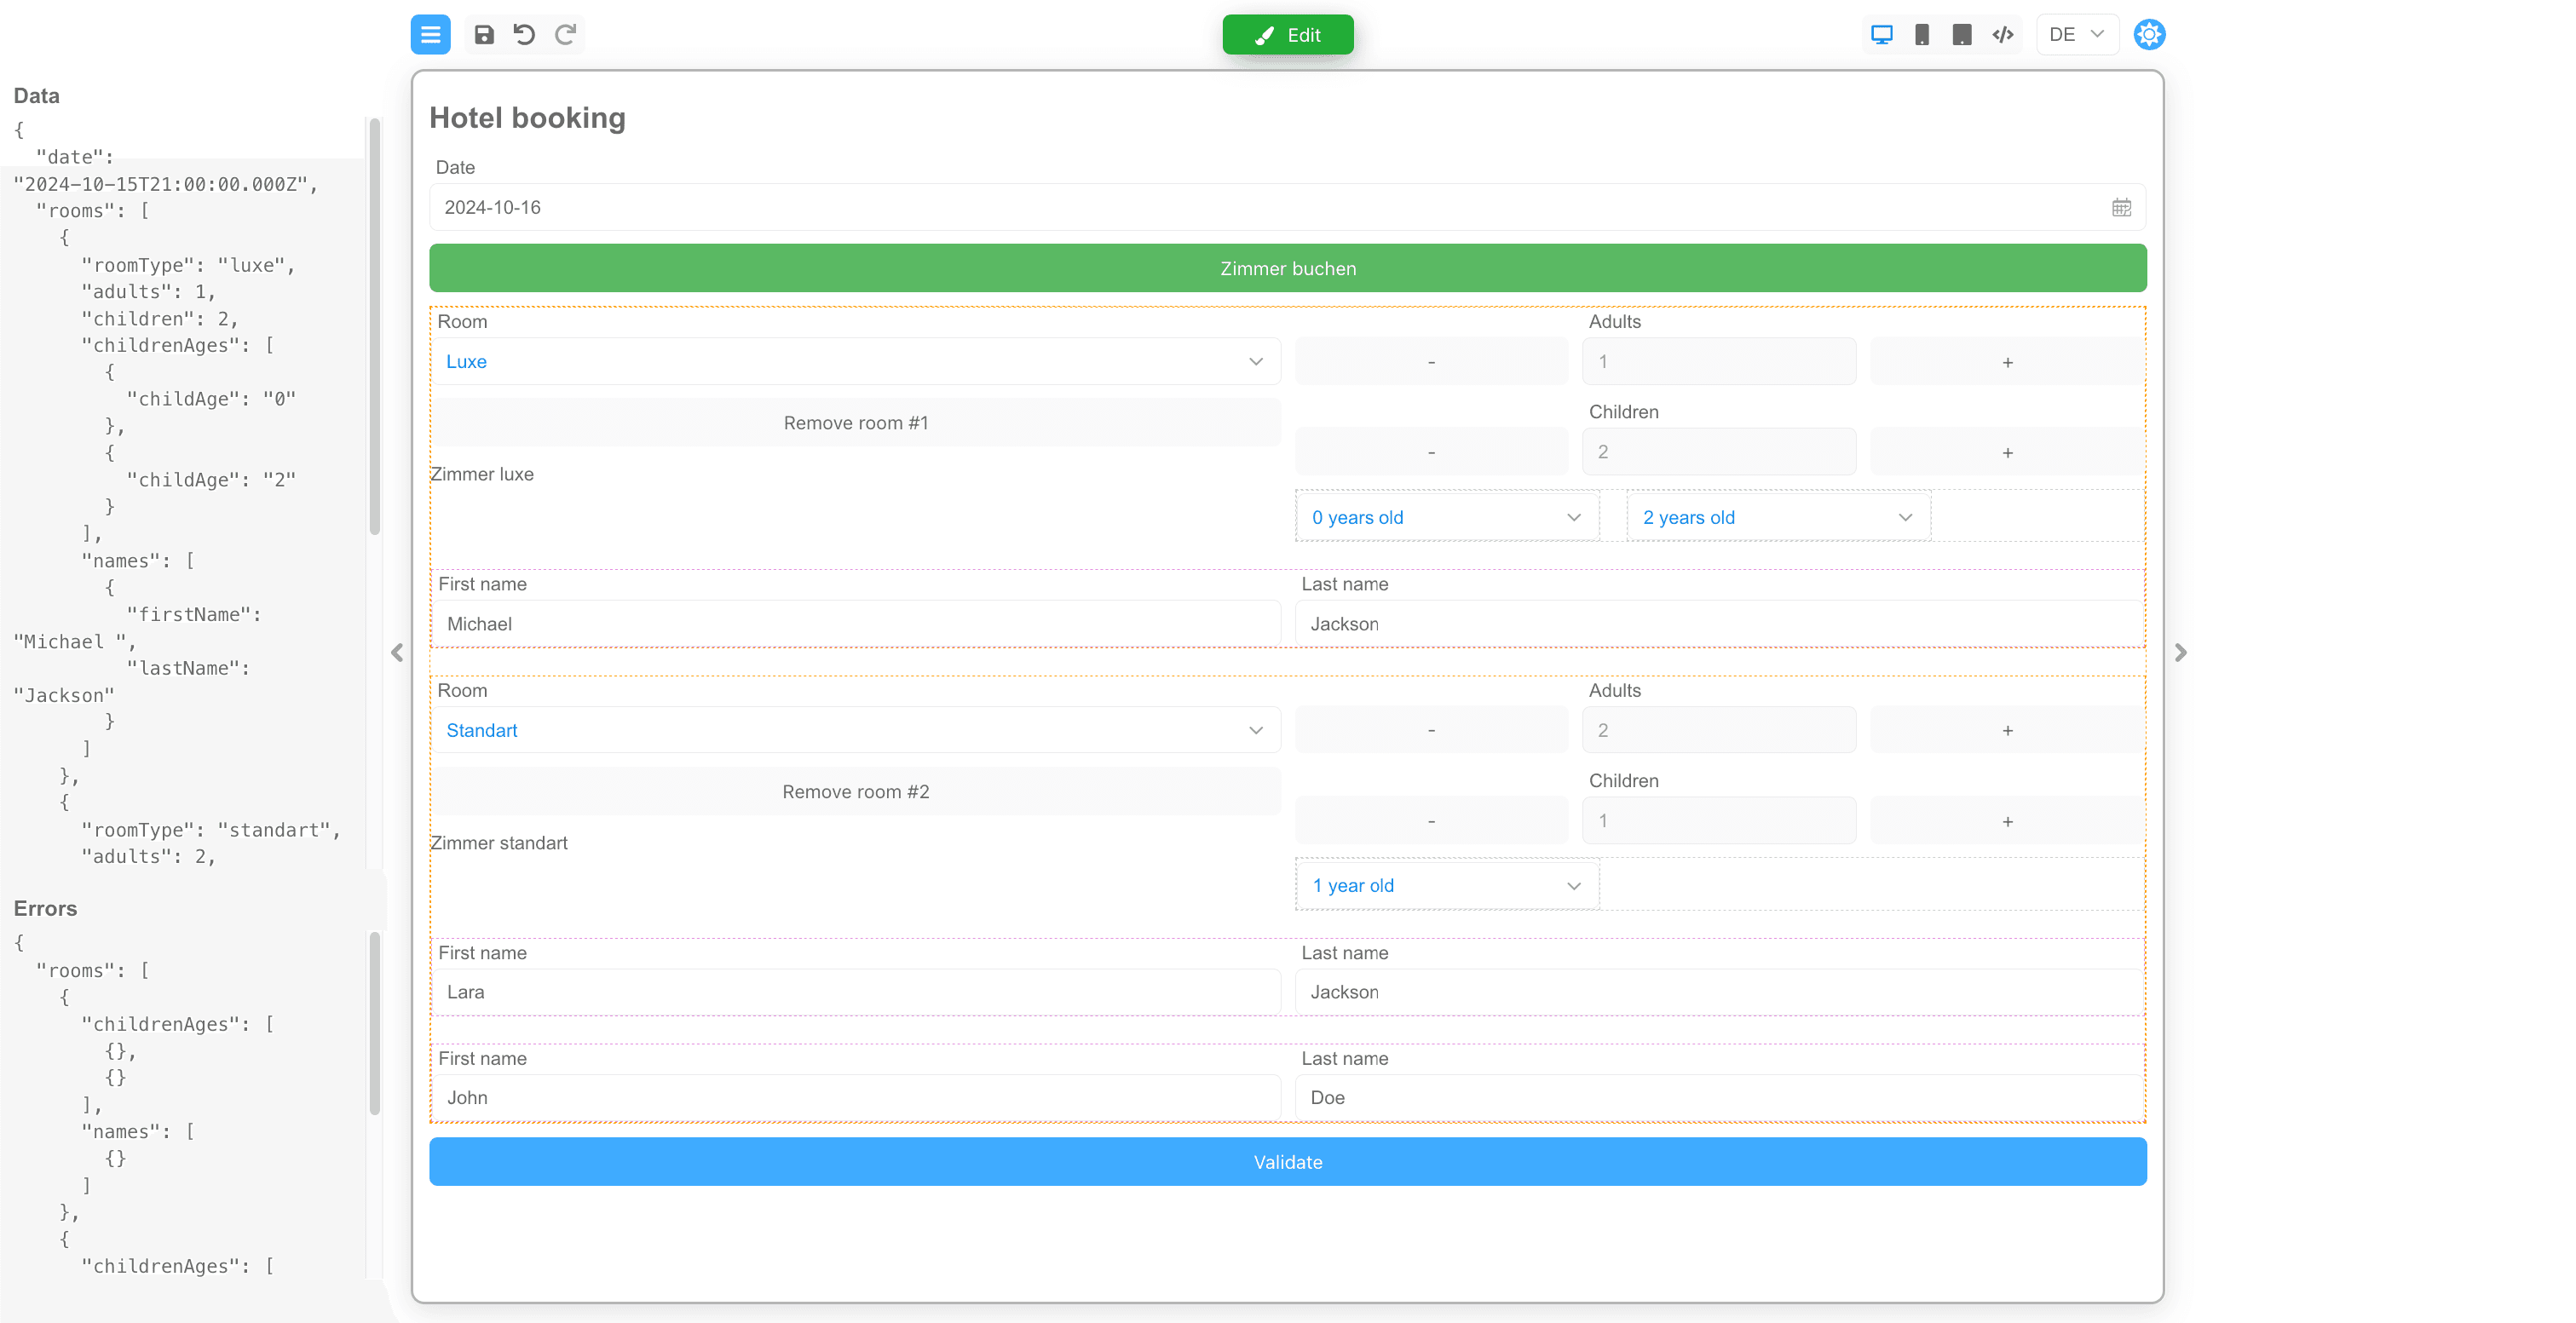
Localization
In localization, only the data of the current element inside the Repeater is available to you. This is how the localization of theContent property for the rsStaticContent1 component looks like:
EN
DE
., this
is the current limitation.
Next steps
- Explore all implementation guides: Guides hub
- Continue with runtime architecture: FormEngine Core
- Add visual form authoring: FormEngine Designer
- Integrate in your stack: Integrations
Official resources
- Runtime package: @react-form-builder/core on npm
- Designer package: @react-form-builder/designer on npm
- Source code and examples: FormEngine GitHub repository
- Commercial Designer plans: Pricing