
Introduction to FormEngine

In the world of React development, managing forms can often become a complex task. Enter Formik, a beloved open-source library that simplifies form management by handling state, validation, and submission seamlessly. However, if you’re looking for even more features and capabilities, look no further than FormEngine. This powerful library not only matches Formik’s capabilities but also extends them, offering advanced features for form management. In this article, we’ll explore how to integrate Formik with FormEngine, allowing you to leverage the strengths of both libraries. Whether you want to reuse existing code or prefer the familiar Formik setup, this guide will help you get started. Let’s omit some boilerplate code and highlight only important things.
Full source code along with other examples available at our public GitHub repository.

Code changes

Highlighted lines indicate the ones that need attention. If the file is created for the first time, then any modified lines are not marked in it. If the file is modified within the tutorial, then the modified, added, and deleted lines are marked in it as follows.
// &att
var x = 42; // highlighted line of code

// &chg
var x = 42; // modified line of code

// &new
var x = 42; // added new line of code

// &del
var x = 42; // deleted line of code

Getting Started with FormEngine and Formik

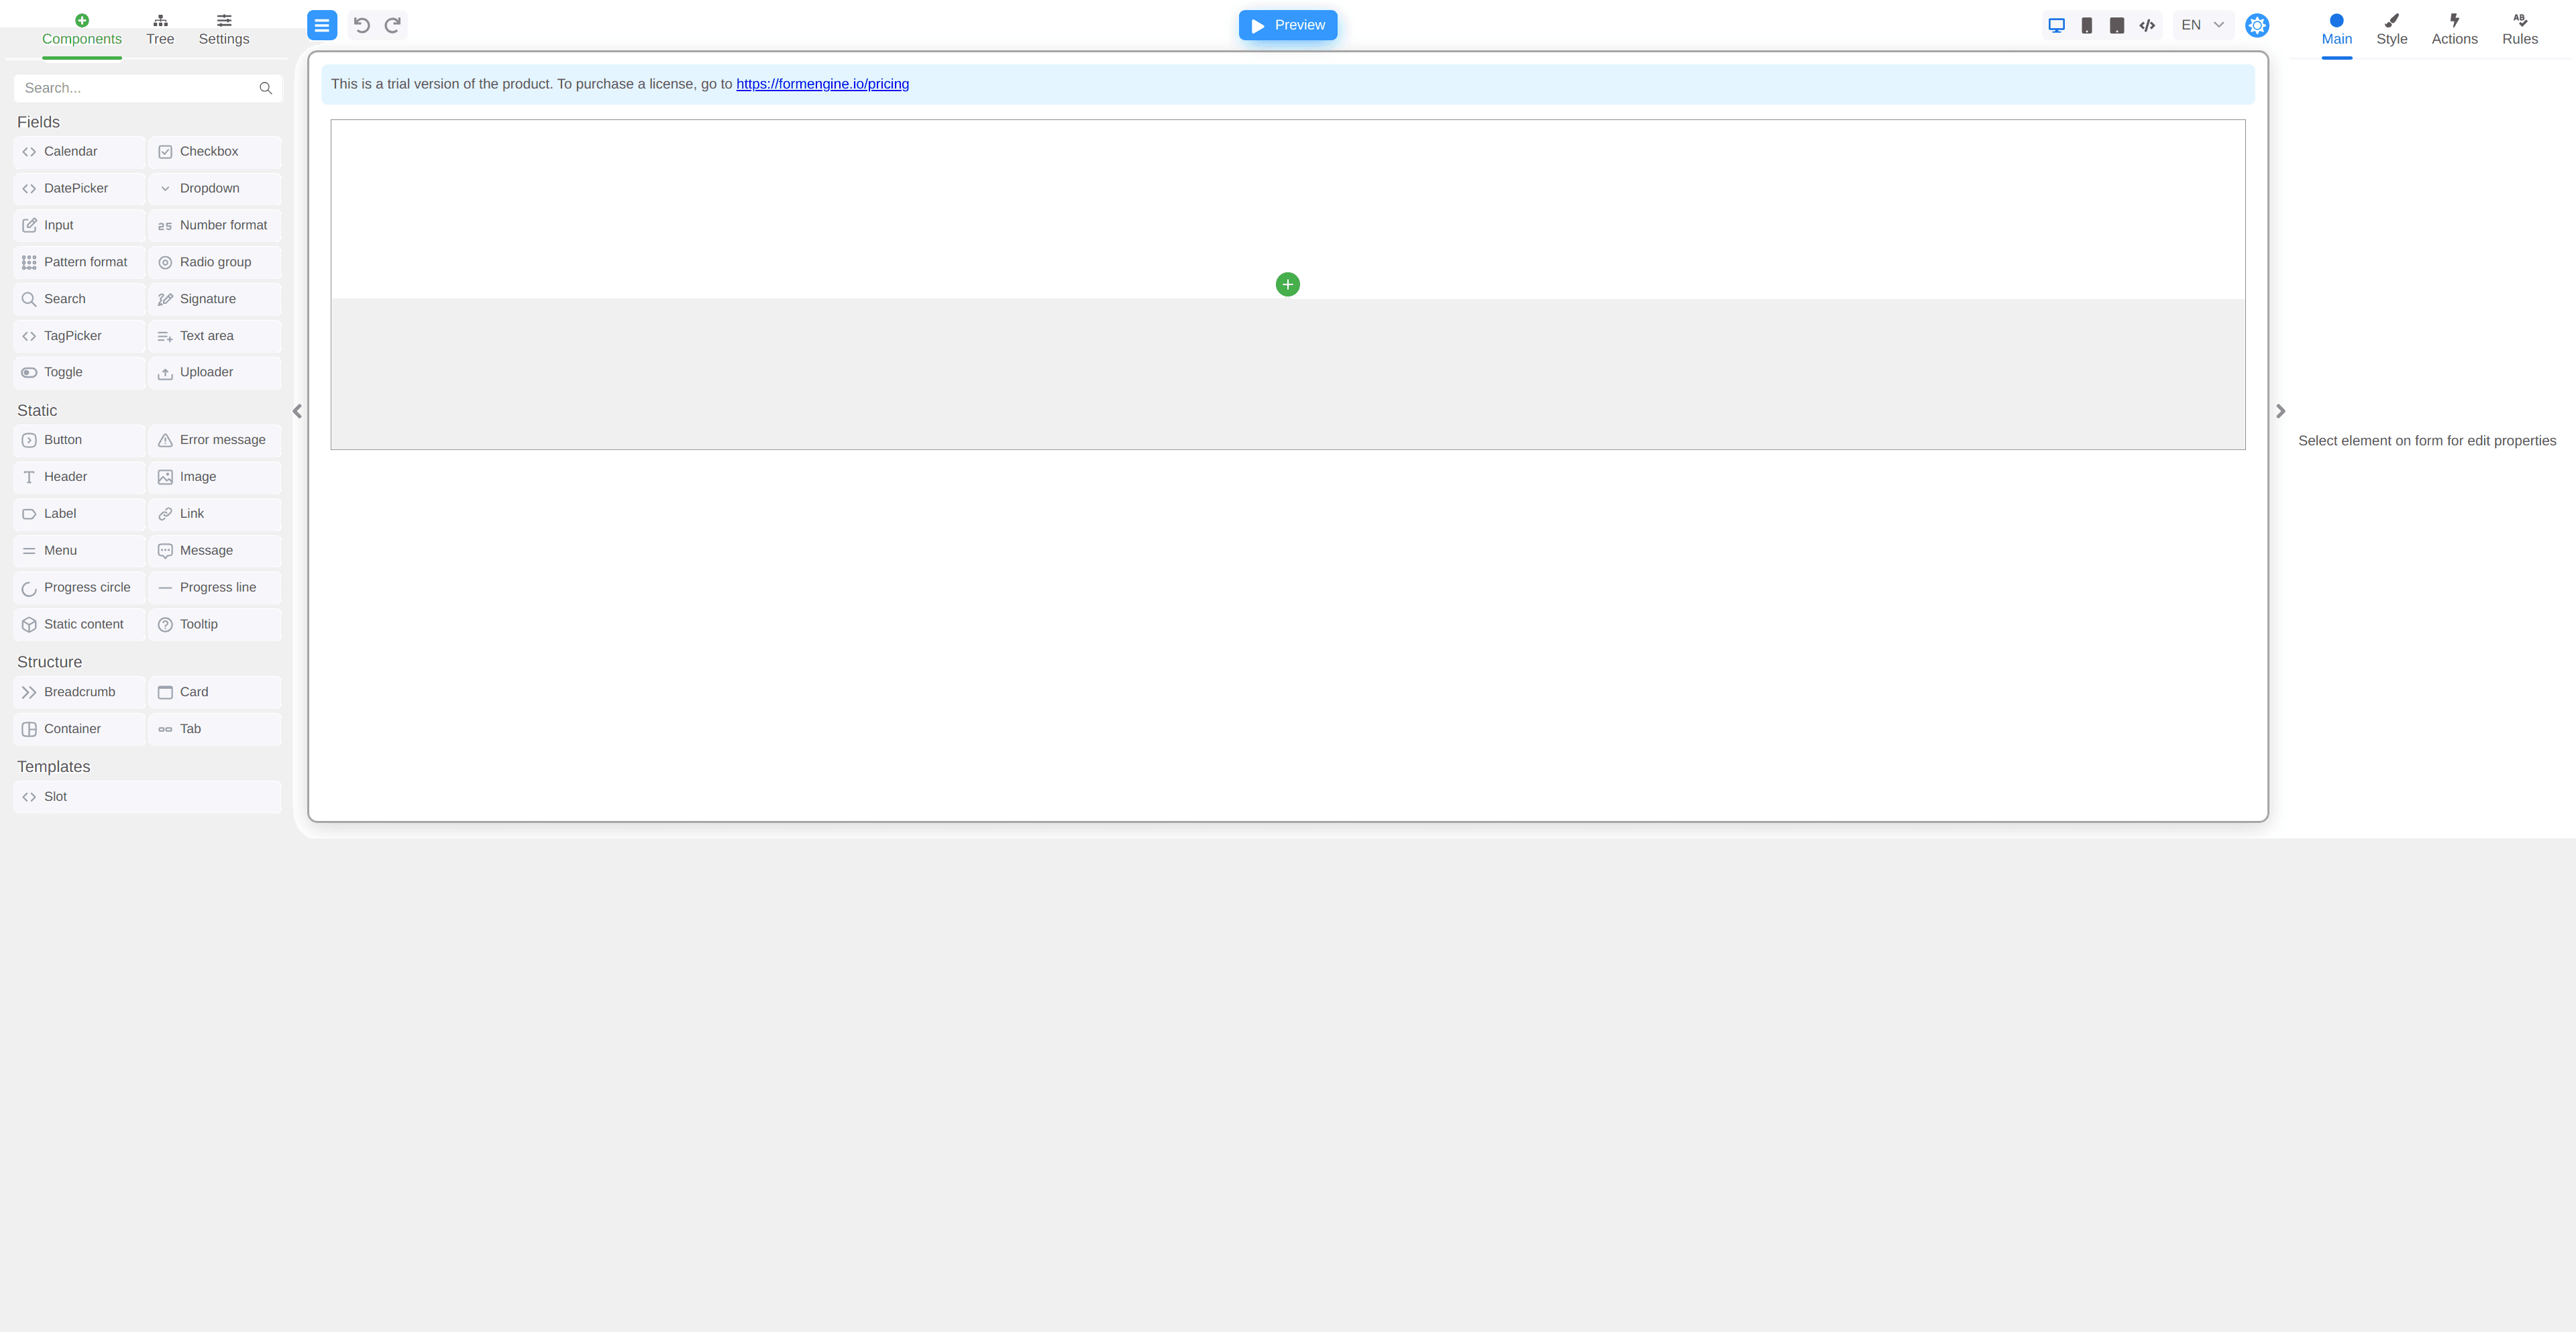
To kick off, create a new React project and install the necessary dependencies. Open your terminal and run the following commands:
npx create-react-app with-formik --template typescript
cd with-formik
npm add formik yup @react-form-builder/core @react-form-builder/components-rsuite @react-form-builder/designer
npm run start

Initializing the FormEngine Designer

Next, replace the contents of App.tsx with the following code to set up FormEngine’s Designer:
src/App.tsx
  formEngineRsuiteCssLoader,
  ltrCssLoader,
  RsLocalizationWrapper,
  rSuiteComponents,
  rtlCssLoader
} from '@react-form-builder/components-rsuite';

const componentsMetadata = rSuiteComponents.map(definer => definer.build())

const formName = 'formikForm'

const formStorage: IFormStorage = {
  getForm: async () => localStorage.getItem(formName) || '{"form":{"key":"Screen","type":"Screen"}}',
  saveForm: async (_, form) => localStorage.setItem(formName, form),
  getFormNames: () => Promise.resolve([formName]),
  removeForm: () => Promise.resolve()
}

const loadForm = () => formStorage.getForm('')

const builderView = new BuilderView(componentsMetadata)
  .withViewerWrapper(RsLocalizationWrapper)
  .withCssLoader(BiDi.LTR, ltrCssLoader)
  .withCssLoader(BiDi.RTL, rtlCssLoader)
  .withCssLoader('common', formEngineRsuiteCssLoader)

// We're hiding the form panel because it's not fully functional in this example
const customization = {
  Forms_Tab: {
    hidden: true
  }
}

function App() {
  return <FormBuilder view={builderView} formStorage={formStorage}
                      customization={customization} getForm={loadForm}/>
}

export default App
Now, you have a minimal FormEngine Designer up and running! Designer

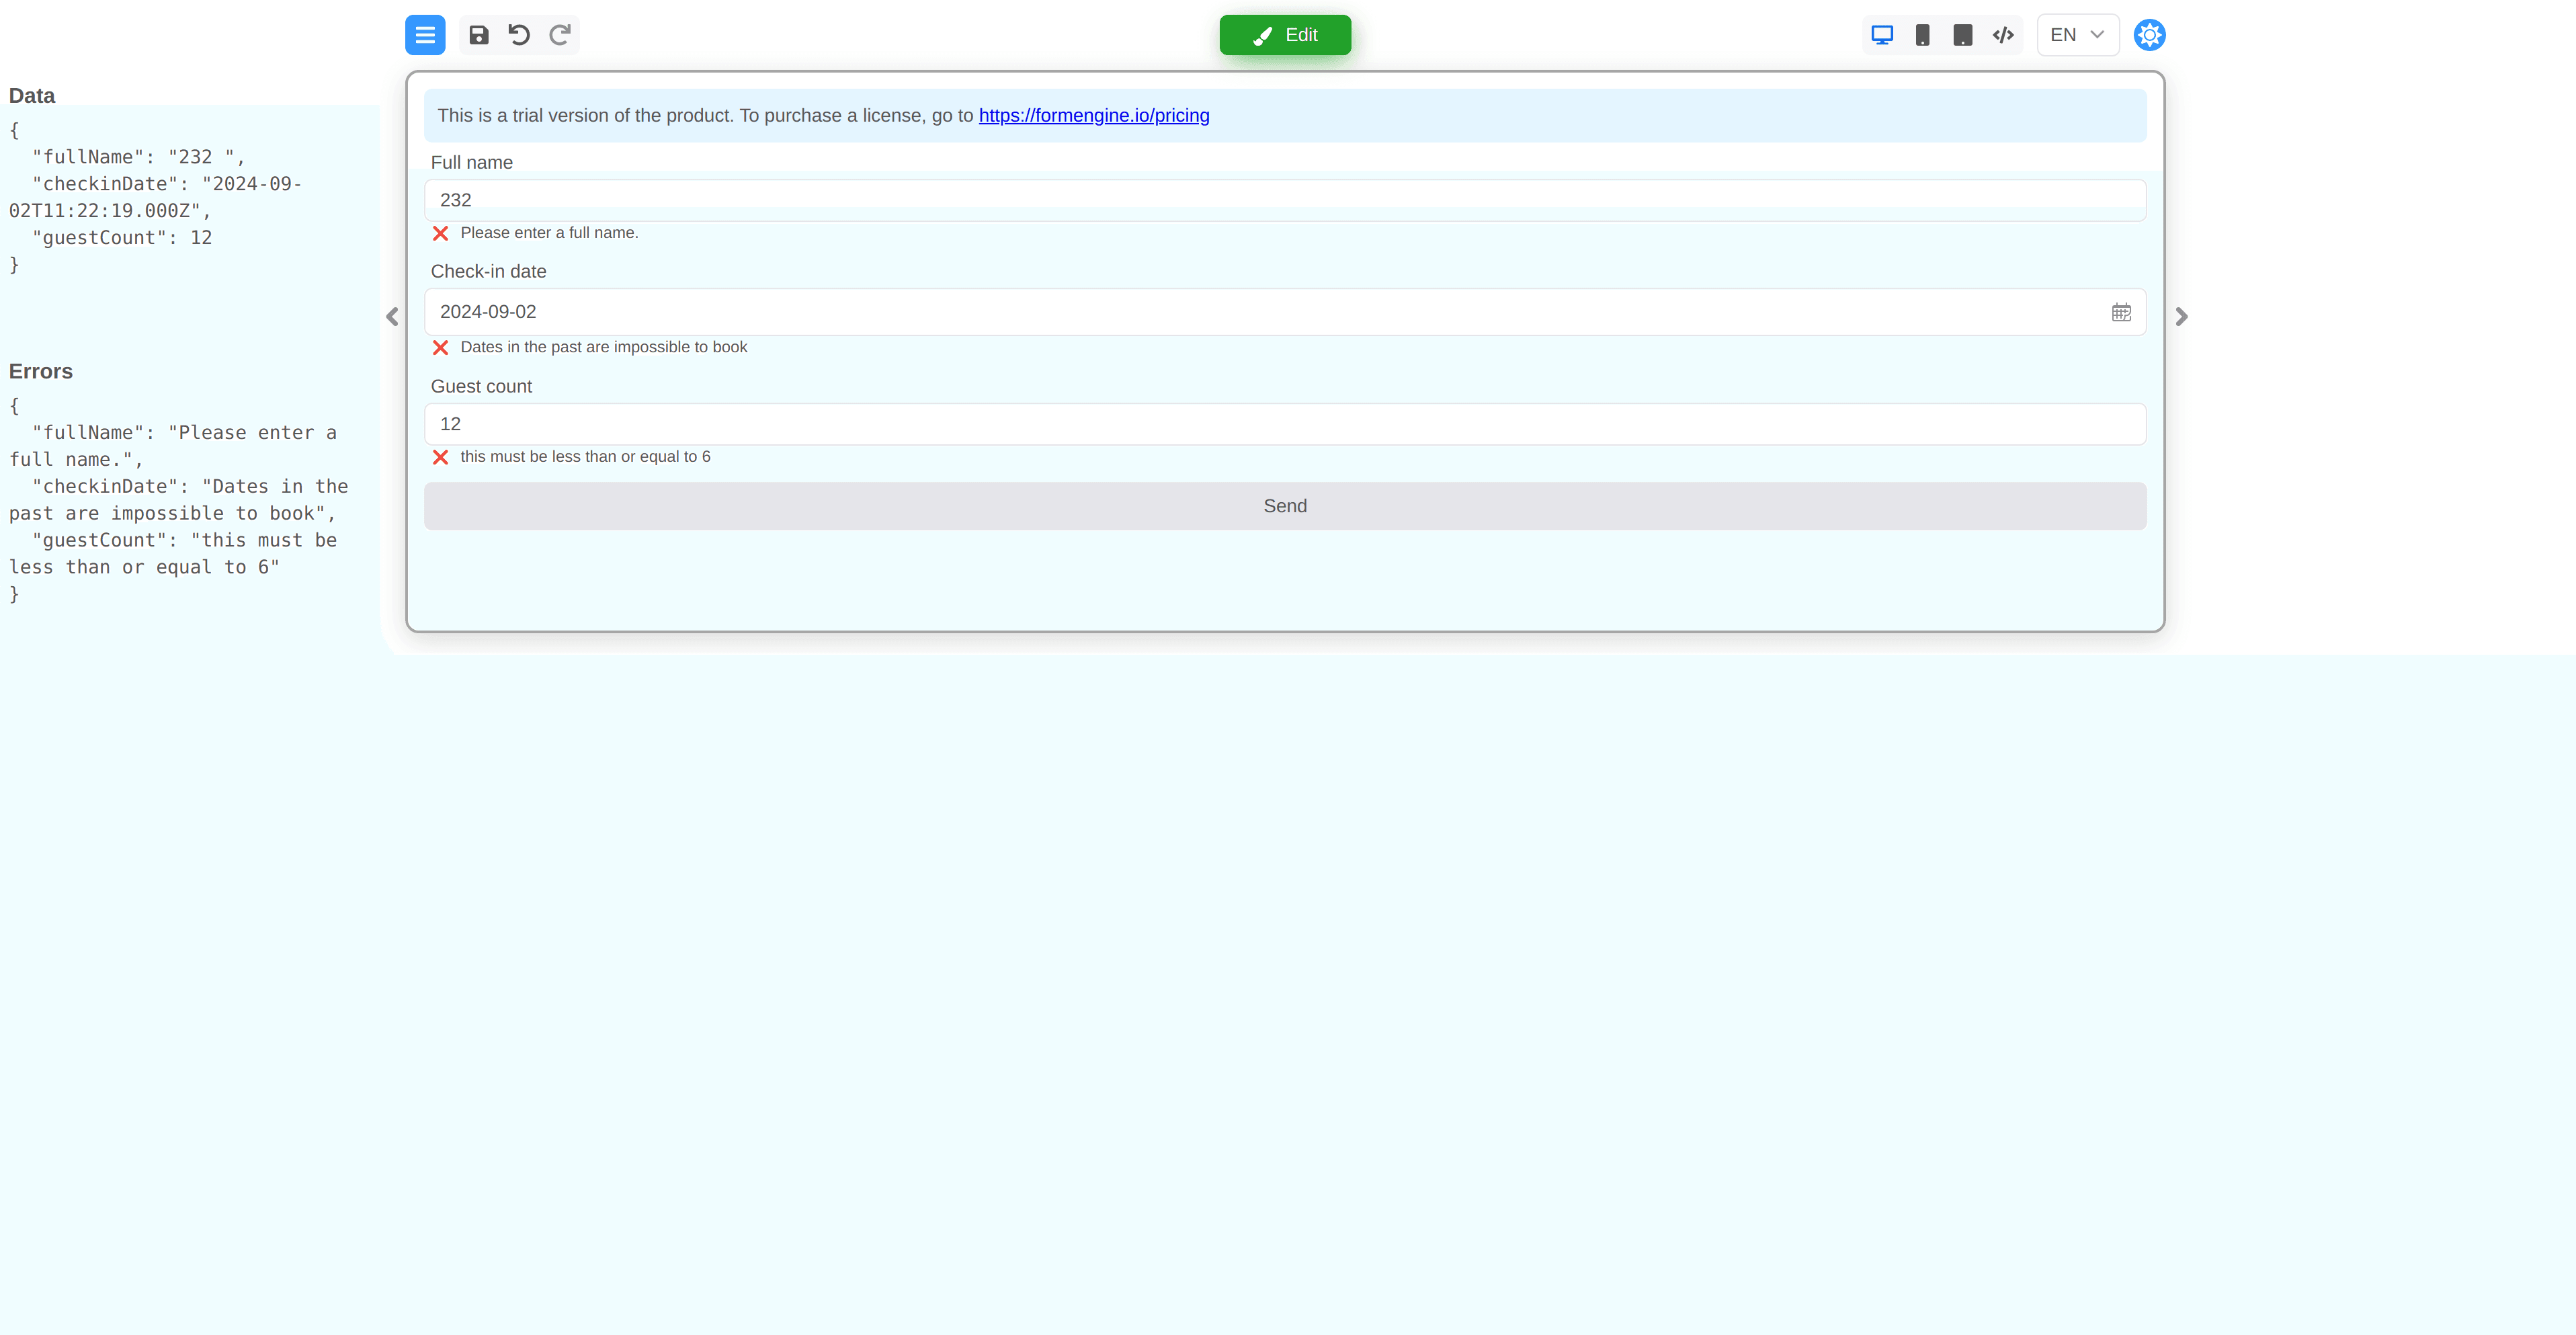
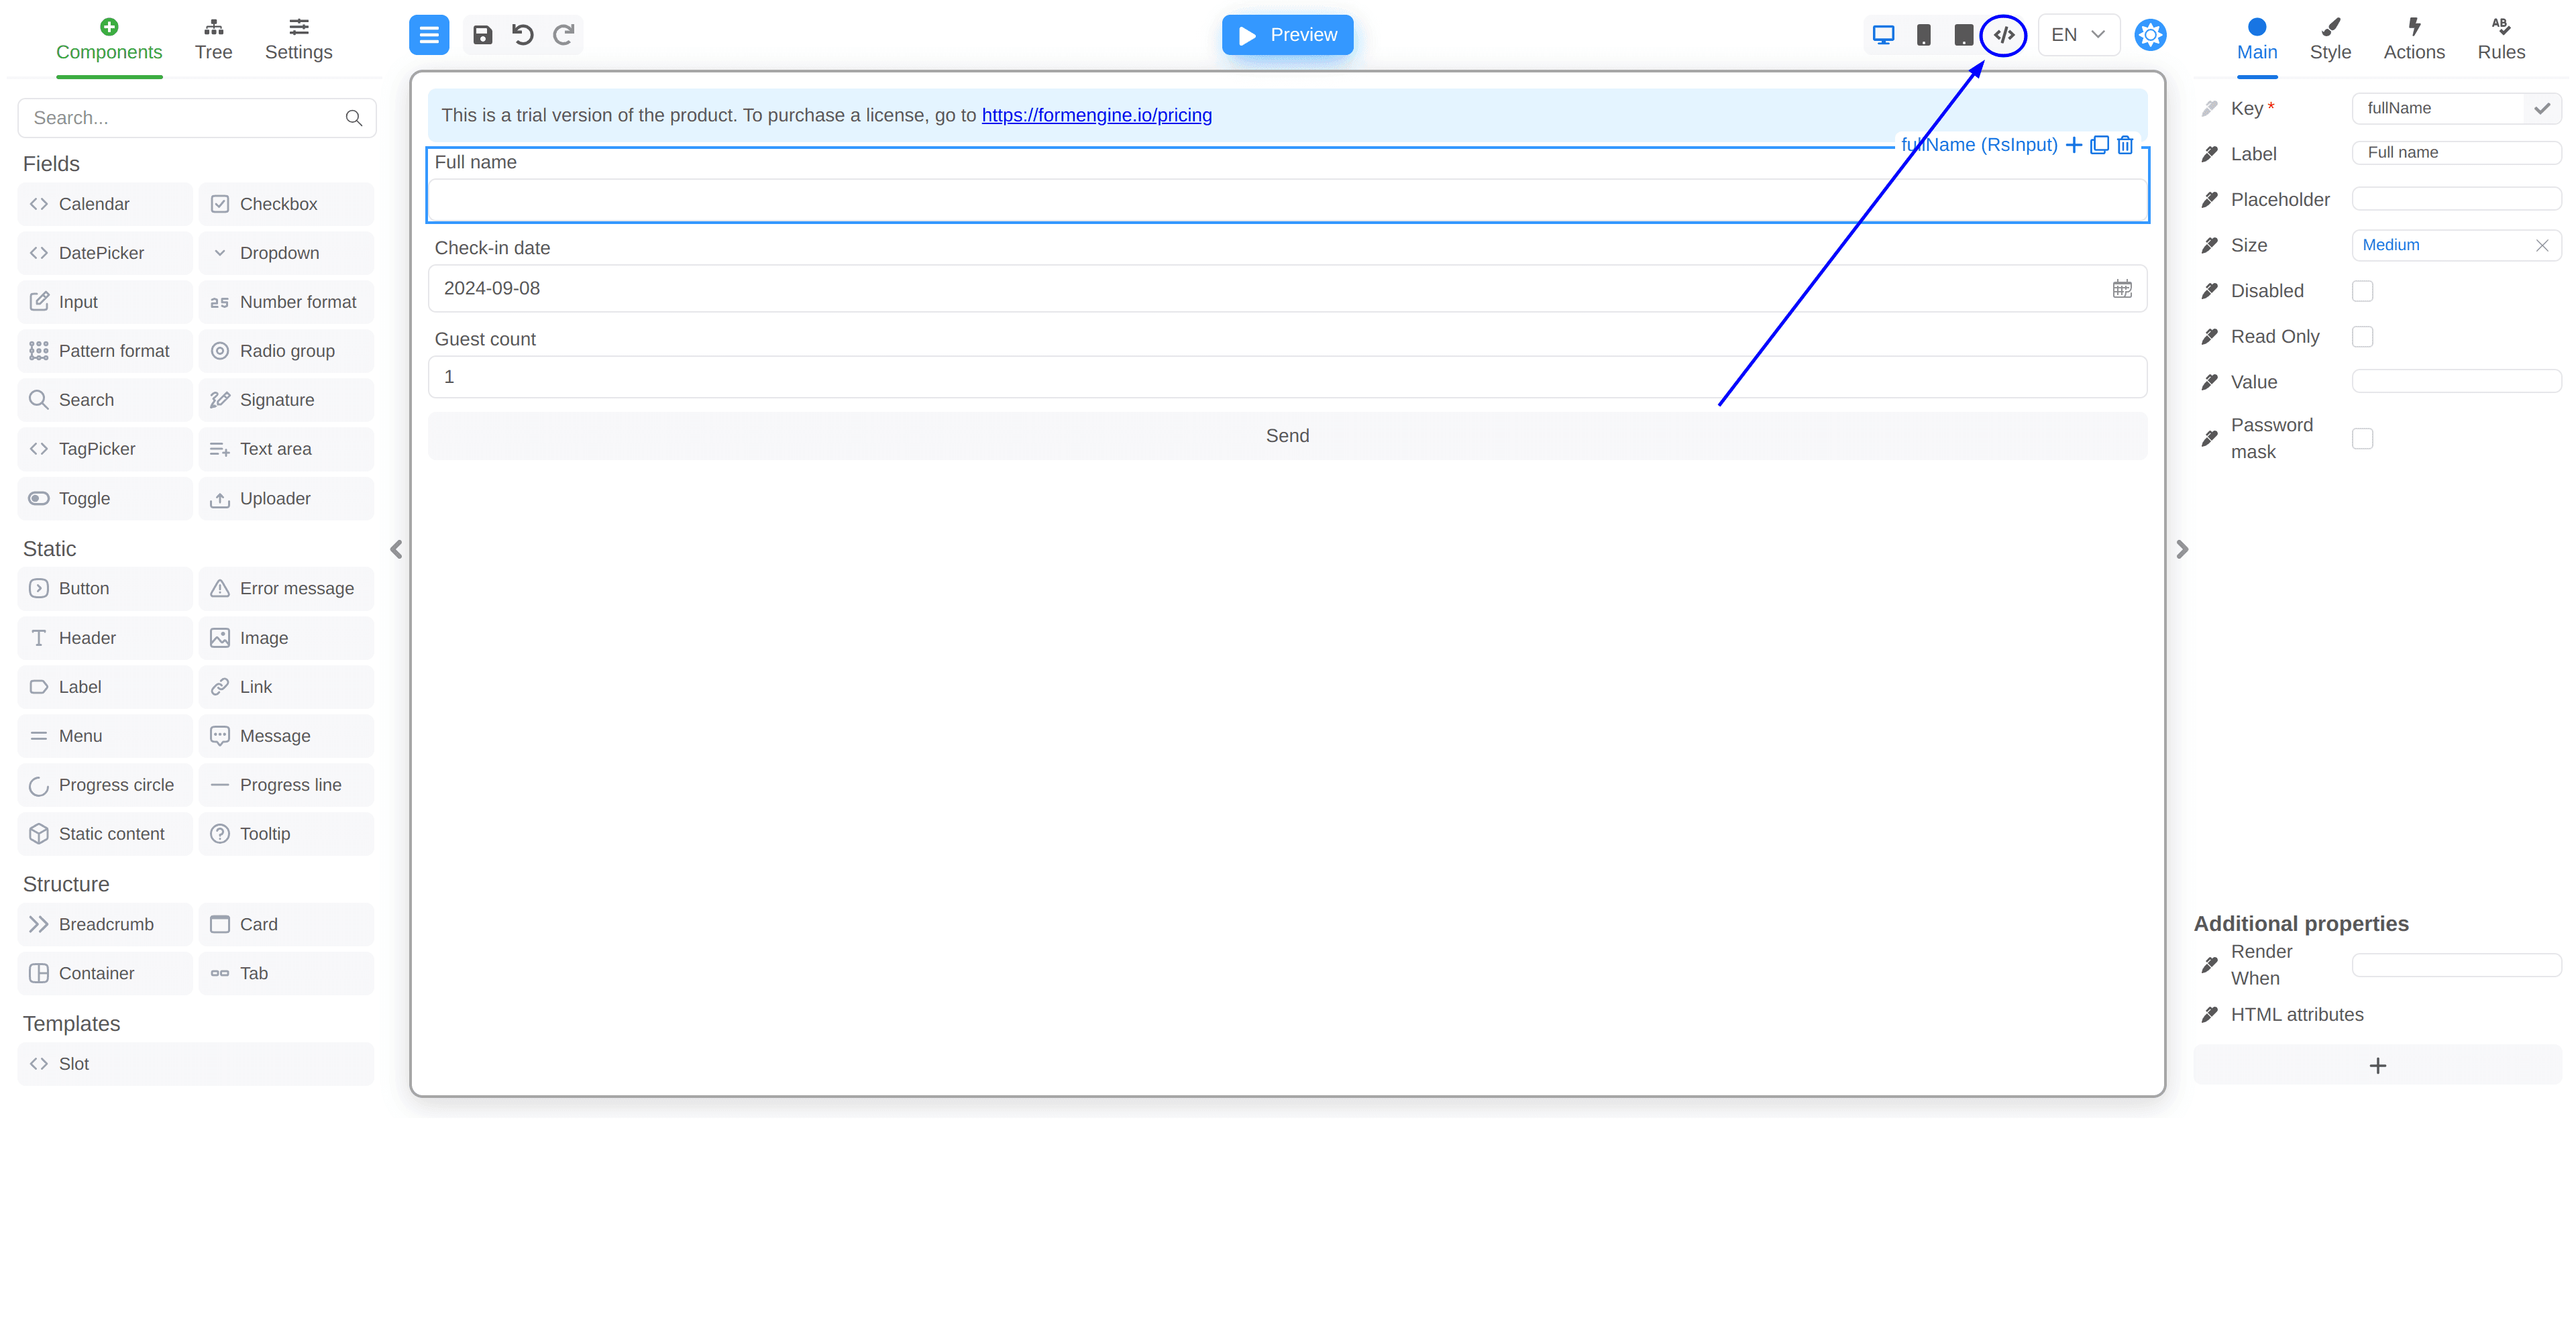
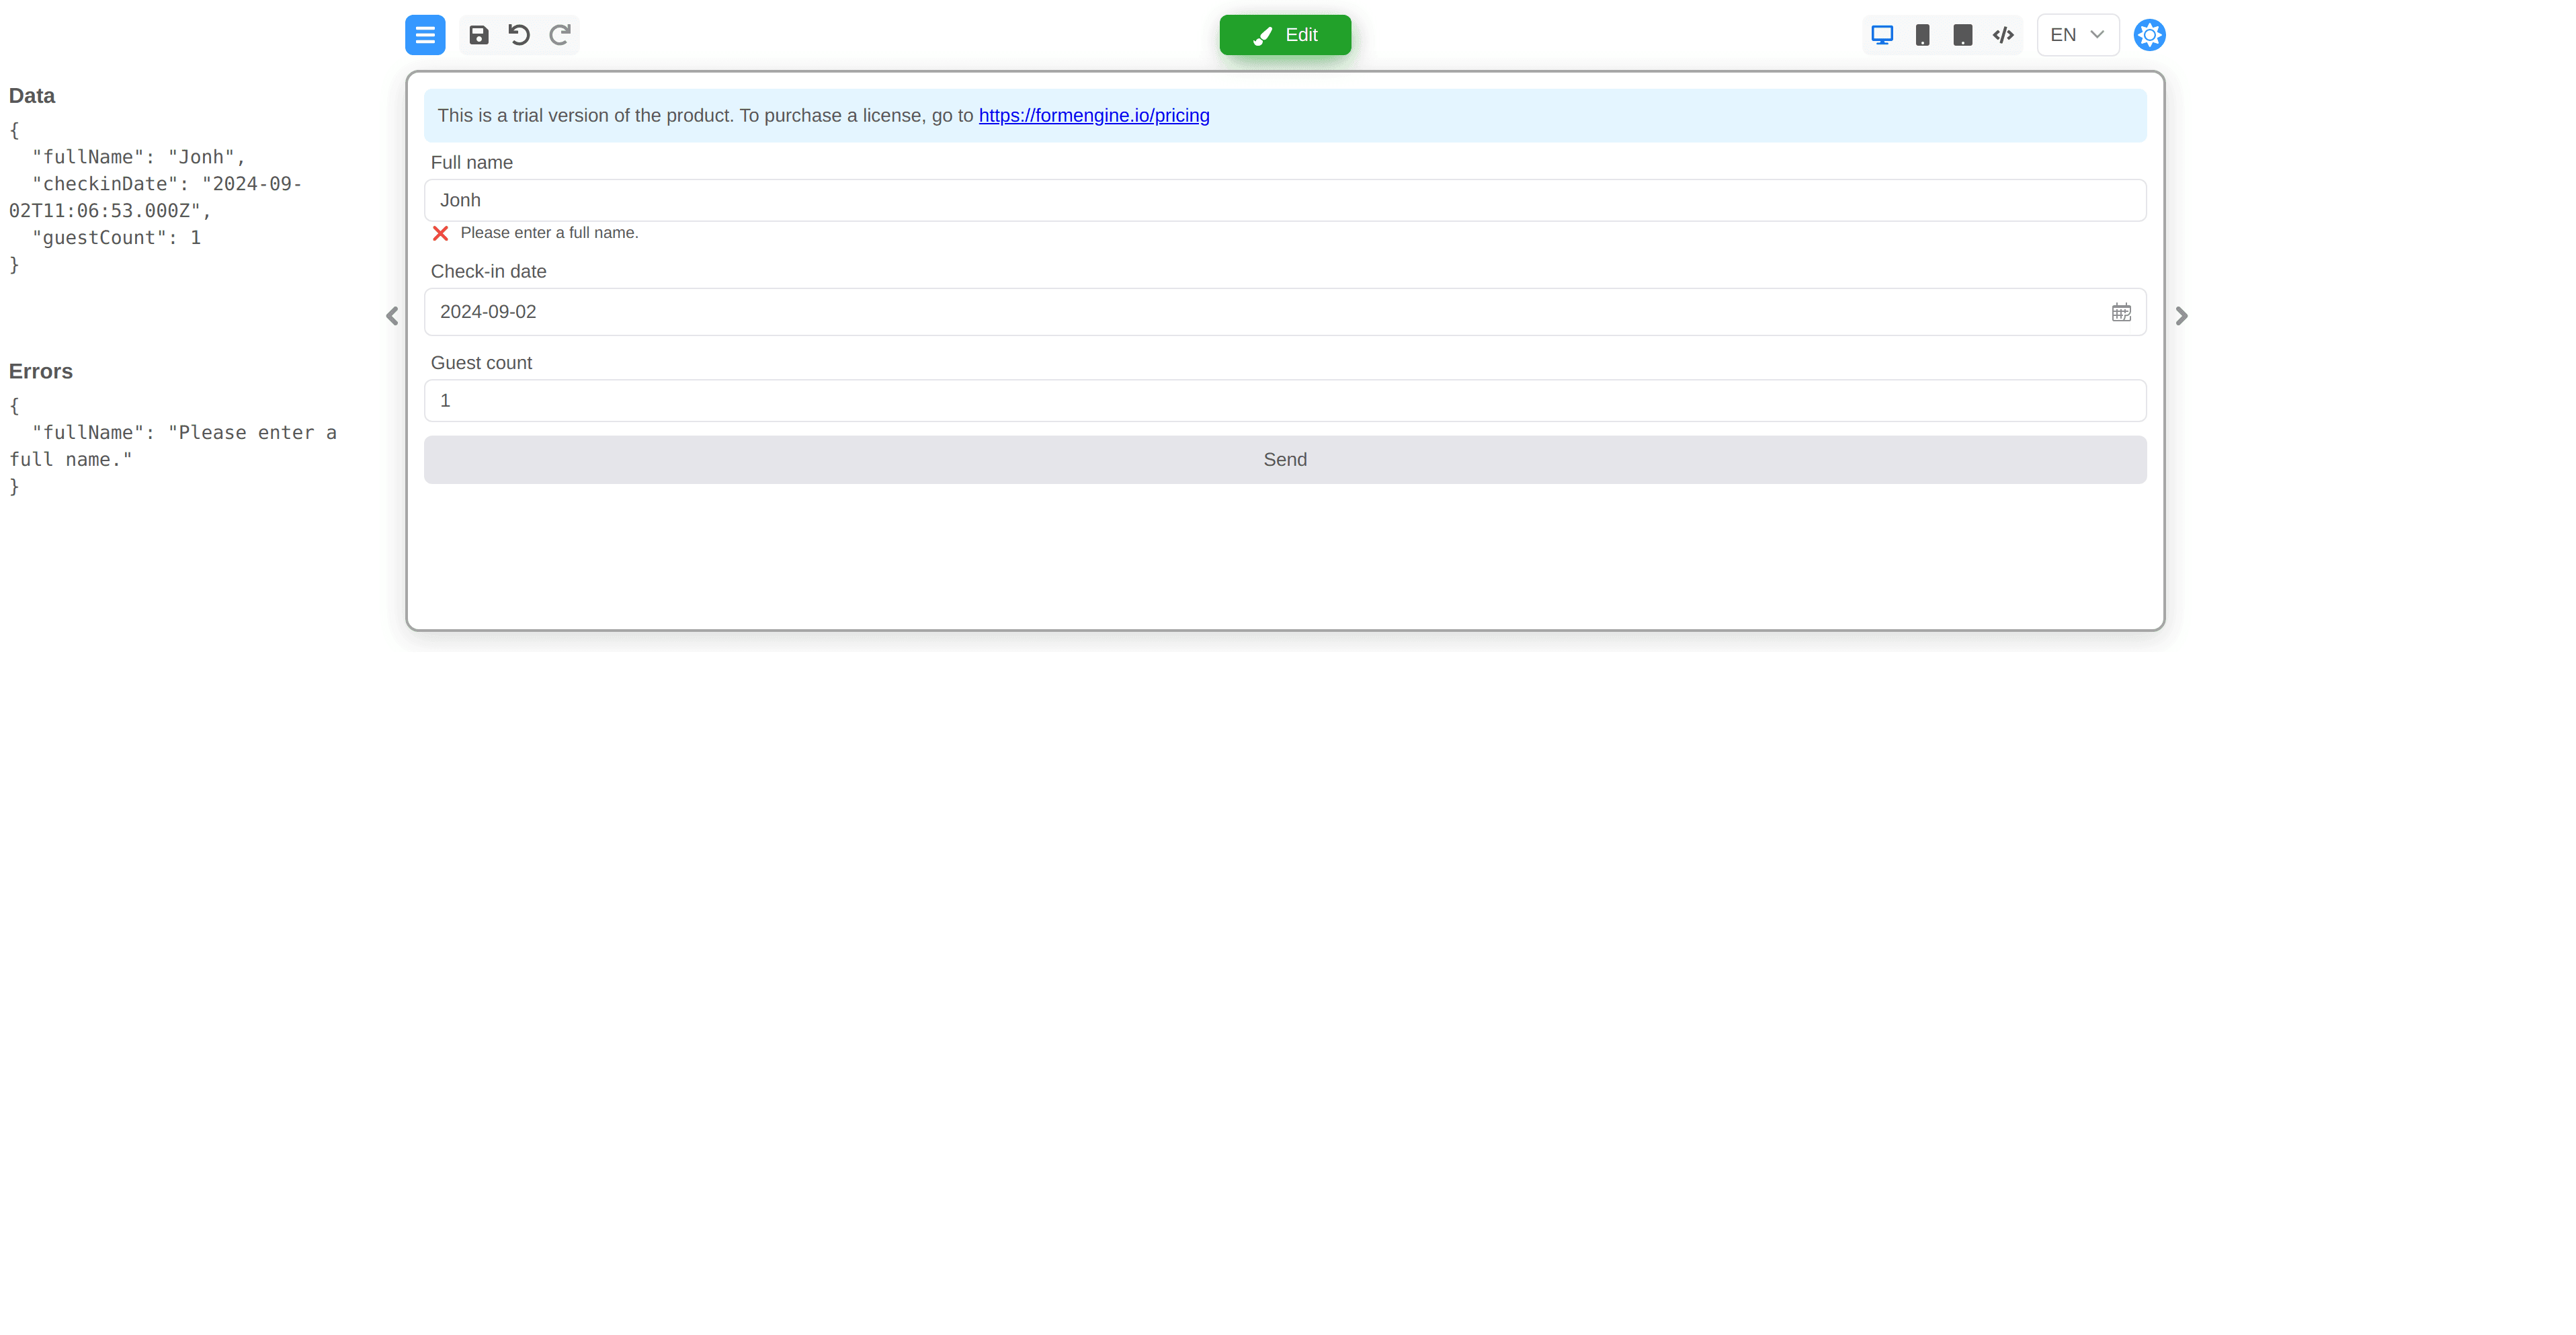
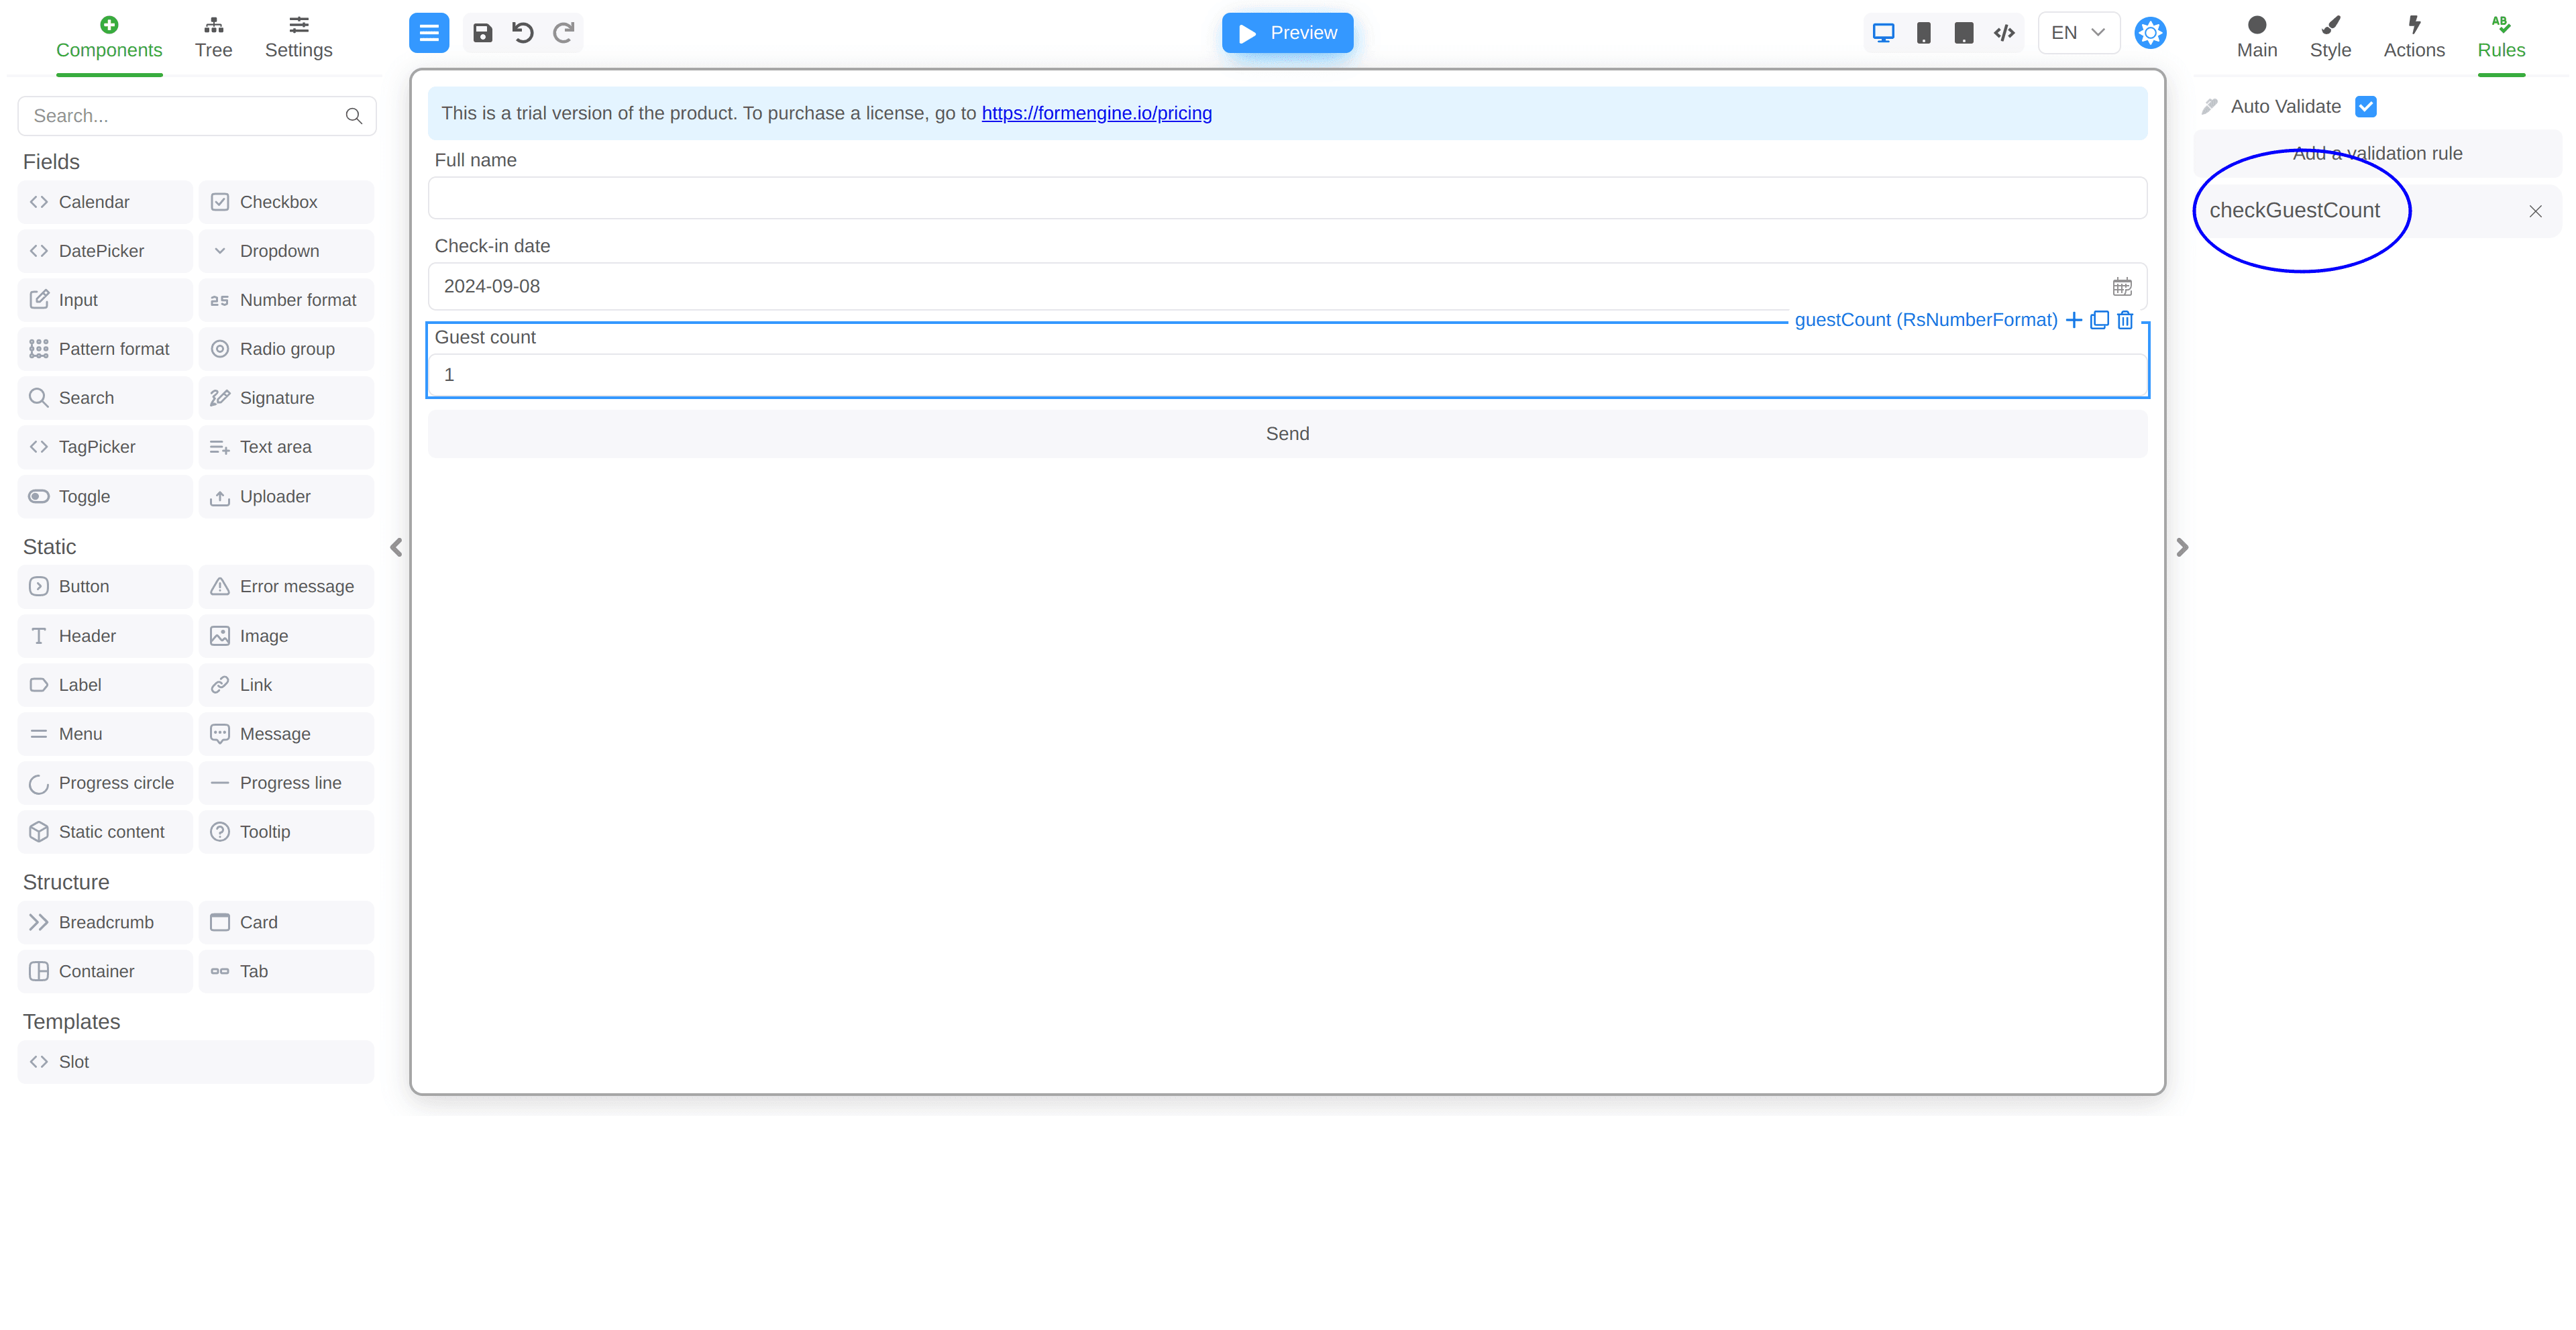
Creating a Simple Booking Form

Let’s create a simple booking form with the following fields:
  • Customer’s Full Name
  • Check-in Date
  • Total Number of Guests
You can either drag and drop components in the designer or use a pre-made form definition bellow. Name fields accordingly: fullName, checkinDate, guestCount. Booking form

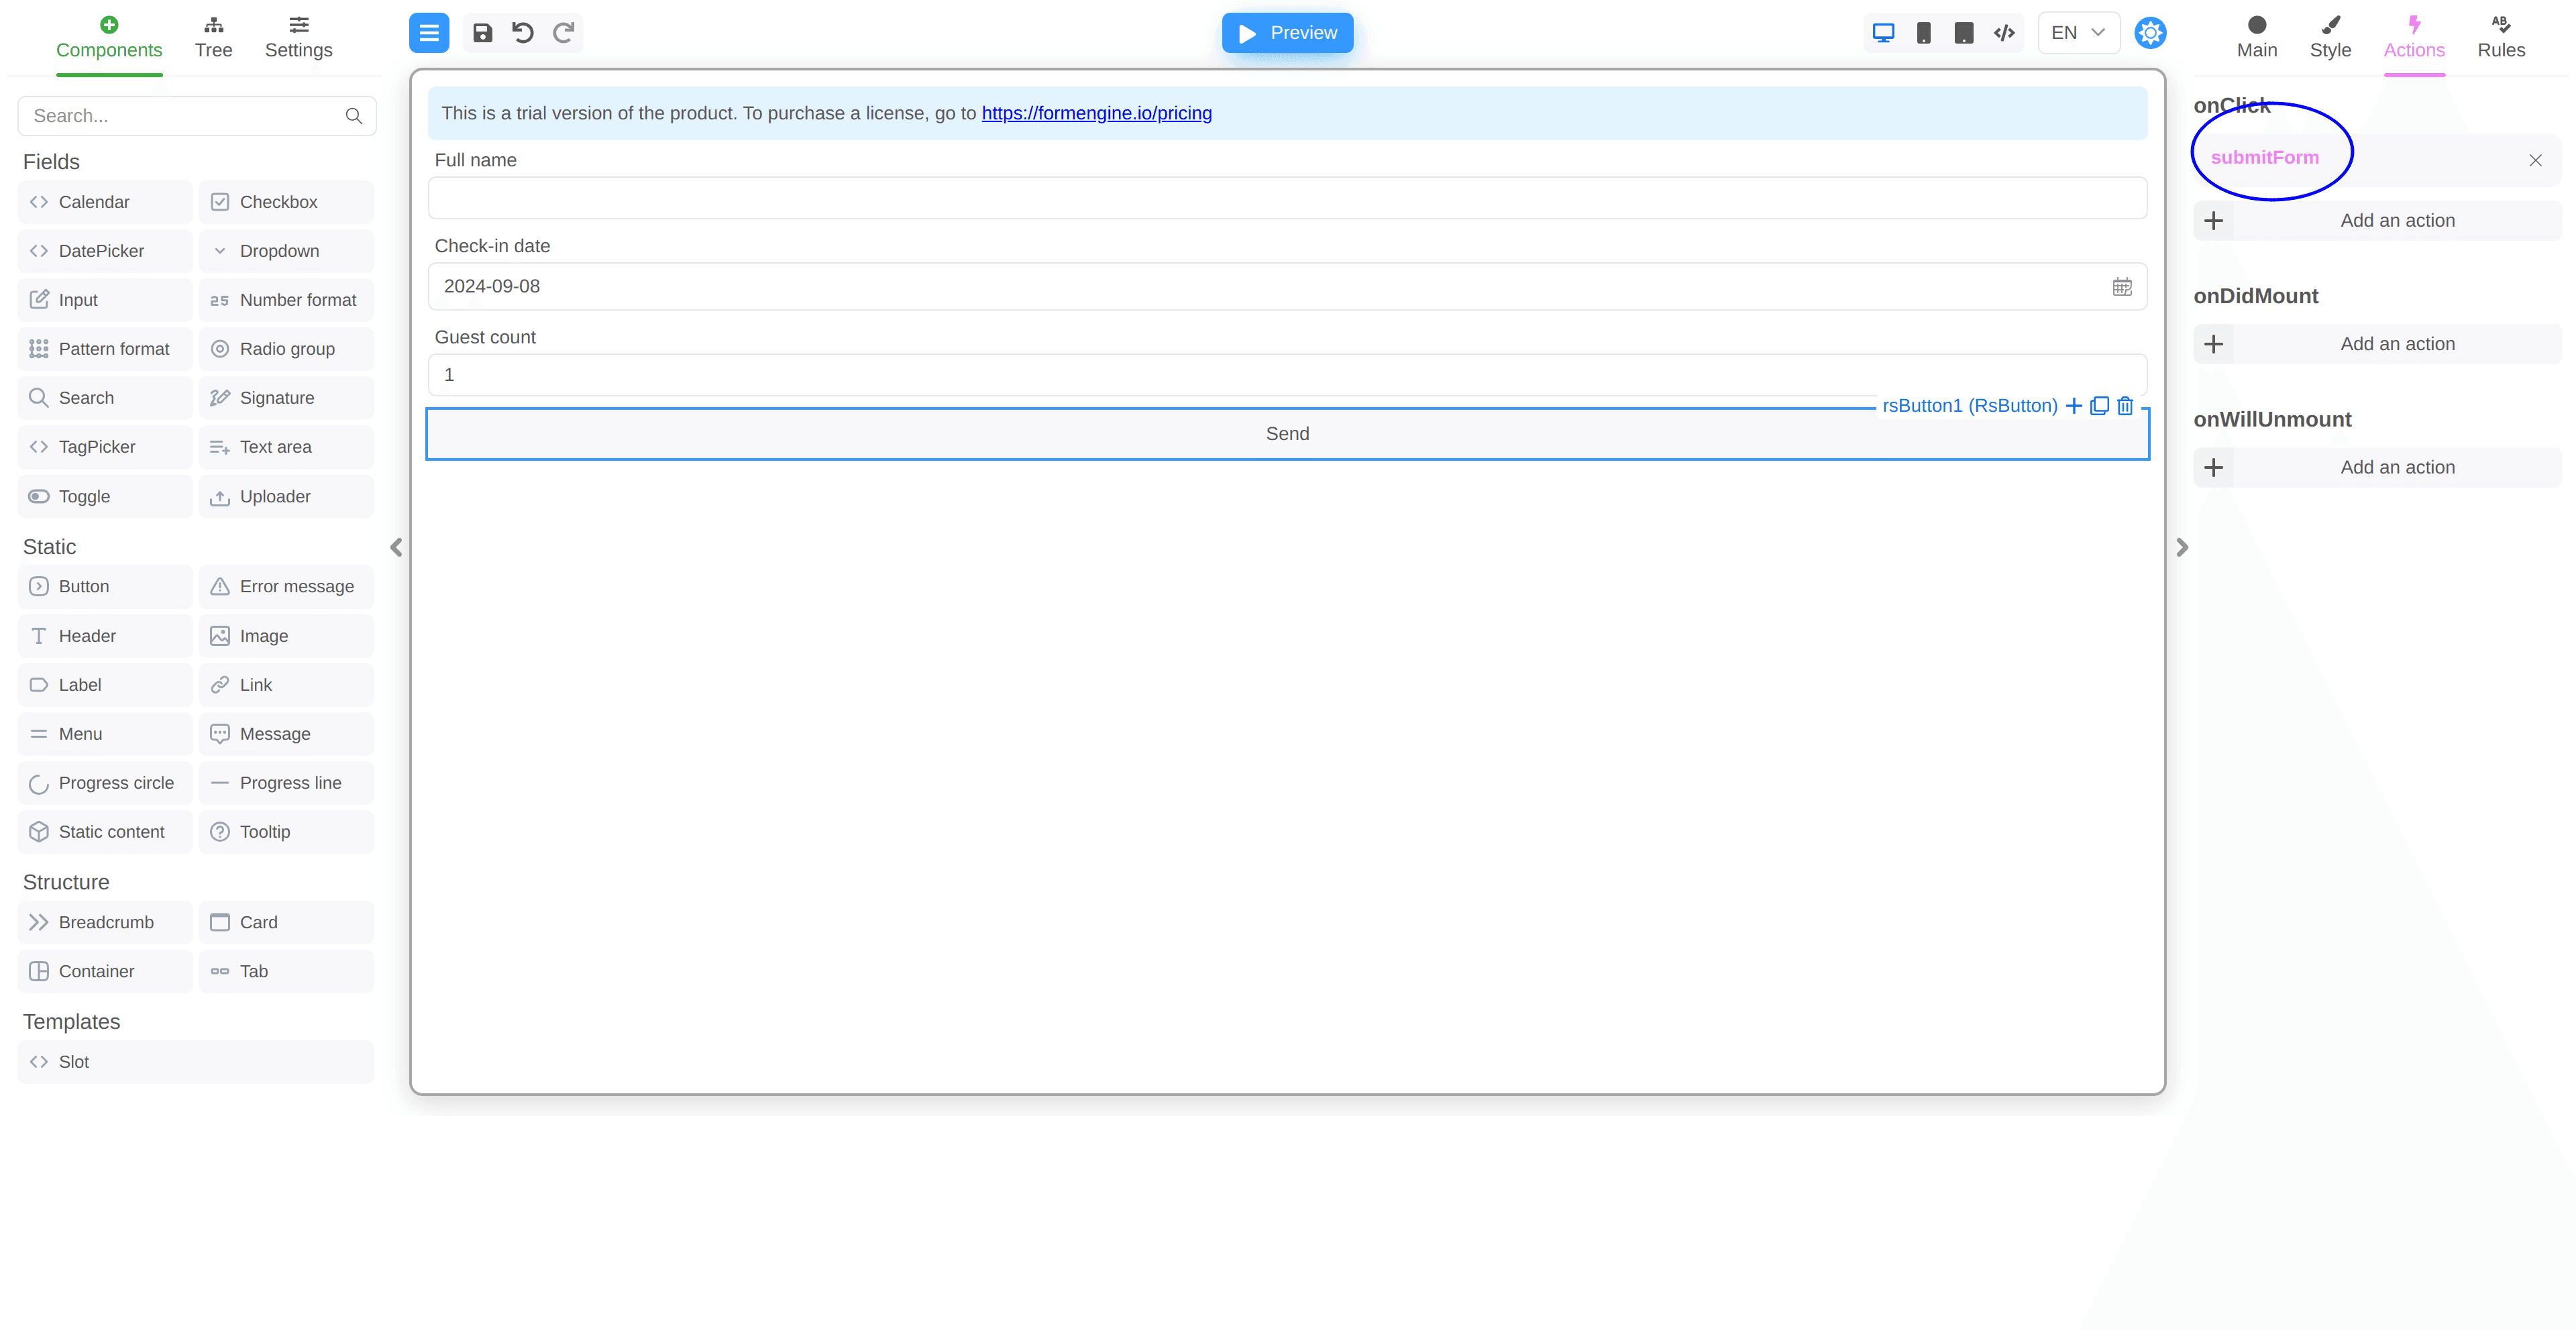
Integrating Formik with Your Booking Form

If you have an existing form implemented with Formik using hooks, you can easily integrate it with FormEngine. Here’s how you can set up the src/useBookingForm.ts:

Bridging FormEngine and Formik

Firstly, we need to change the target for TypeScript (because we are using iteration on object properties):
tsconfig.json
{
  "compilerOptions": {
    // &chg>
    "target": "es2015",
    // <&chg
    "lib": [
      "dom",
      "dom.iterable",
      "esnext"
    ],
    "allowJs": true,
    "skipLibCheck": true,
    "esModuleInterop": true,
    "allowSyntheticDefaultImports": true,
    "strict": true,
    "forceConsistentCasingInFileNames": true,
    "noFallthroughCasesInSwitch": true,
    "module": "esnext",
    "moduleResolution": "node",
    "resolveJsonModule": true,
    "isolatedModules": true,
    "noEmit": true,
    "jsx": "react-jsx"
  },
  "include": [
    "src"
  ]
}
To connect FormEngine with Formik, we need to pass values between them and handle validation errors. Update the App.tsx file, you can just replace the contents with the code below (major changes are highlighted):
src/App.tsx
// &chg>
// <&chg
// &new>
// <&new
  formEngineRsuiteCssLoader,
  ltrCssLoader,
  RsLocalizationWrapper,
  rSuiteComponents,
  rtlCssLoader
} from '@react-form-builder/components-rsuite';

const componentsMetadata = rSuiteComponents.map(definer => definer.build())

const formName = 'formikForm'

const formStorage: IFormStorage = {
  getForm: async () => localStorage.getItem(formName) || '{"form":{"key":"Screen","type":"Screen"}}',
  saveForm: async (_, form) => localStorage.setItem(formName, form),
  getFormNames: () => Promise.resolve([formName]),
  removeForm: () => Promise.resolve()
}

const loadForm = () => formStorage.getForm('')

const builderView = new BuilderView(componentsMetadata)
  .withViewerWrapper(RsLocalizationWrapper)
  .withCssLoader(BiDi.LTR, ltrCssLoader)
  .withCssLoader(BiDi.RTL, rtlCssLoader)
  .withCssLoader('common', formEngineRsuiteCssLoader)

// We're hiding the form panel because it's not fully functional in this example
const customization = {
  Forms_Tab: {
    hidden: true
  }
}

function App() {
  // &new>
  const [formik] = useBookingForm()

  const setFormikValues = useMemo(() => debounce(async (form: IFormData) => {
    const {fields} = form as ComponentData

    for (const [key, {value}] of fields) {
      const field = formik.getFieldProps(key)
      if (value !== field.value) {
        try {
          await formik.setFieldValue(key, value)
          await formik.validateField(key)
        } catch (e) {
          console.warn(e)
        }
      }
    }
  }, 400), [formik])

  const setFormEngineErrors = useCallback((errors: BookingFormErrors, form: ComponentData) => {
    const {fields} = form

    Object.entries(errors).forEach(([key, error]) => {
      if (fields.has(key)) {
        (fields.get(key) as Field).setError(error)
      }
    })
  }, [])

  return <FormBuilder
    view={builderView}
    customization={customization}
    formStorage={formStorage}
    initialData={formik.values}
    onFormDataChange={setFormikValues}
    getForm={loadForm}
    actions={{
      submitForm: ActionDefinition.functionalAction(async (e) => {
        const errors = await formik.validateForm()

        if (Object.keys(errors).length > 0) {
          return setFormEngineErrors(errors, e.store.formData)
        }
        await formik.submitForm()
      }),
    }}
  />
  // <&new
}

export default App
Notice that we’ve added a common action. Now you can bind the action to the Send button, as in the screenshot below. Formik submit Now press Send button and see everything works, data passed to Formik and validation errors sent back to our form. Form synced data and errors

Leveraging Yup for Validation

Yup is a powerful validation library that works seamlessly with Formik and is recommended by its team. To enhance our validation process, we can define Yup validators and integrate them into our FormEngine setup. Let’s rewrite our validation using Yup and use it. We are going to bind Yup validators directly to FormEngine native validation, but we also can use it inside Formik form definition as shown above. Create a validators.ts file:
src/validators.ts

export const fullName = Yup.string().required().test({
  message: 'Please enter a full name',
  test: (value: string) => !!value && value.trim().split(' ').length > 1
})

export const dateTodayOrInTheFuture = Yup.date().required().test({
  message: 'Dates in the past are impossible to book',
  test: (value: Date) => {
    const today = new Date()
    const date = new Date(value)

    today.setHours(0, 0, 0, 0);
    date.setHours(0, 0, 0, 0);

    return date >= today
  }
})

export const checkGuestsCount = Yup.number().required().min(1).max(6)
Define common validators and small helper function toFormEngineValidate which will be the bridge between two libraries. Please notice validation is now done by FormEngine and we sync errors back to Formik. Then, update your App.tsx to utilize these validators within FormEngine (major changes are highlighted):
src/App.tsx
// &chg>
// <&chg
  formEngineRsuiteCssLoader,
  ltrCssLoader,
  RsLocalizationWrapper,
  rSuiteComponents,
  rtlCssLoader
} from '@react-form-builder/components-rsuite';
// &new>
// <&new

const componentsMetadata = rSuiteComponents.map(definer => definer.build())

const formName = 'formikForm'

const formStorage: IFormStorage = {
  getForm: async () => localStorage.getItem(formName) || '{"form":{"key":"Screen","type":"Screen"}}',
  saveForm: async (_, form) => localStorage.setItem(formName, form),
  getFormNames: () => Promise.resolve([formName]),
  removeForm: () => Promise.resolve()
}

const loadForm = () => formStorage.getForm('')

const builderView = new BuilderView(componentsMetadata)
  .withViewerWrapper(RsLocalizationWrapper)
  .withCssLoader(BiDi.LTR, ltrCssLoader)
  .withCssLoader(BiDi.RTL, rtlCssLoader)
  .withCssLoader('common', formEngineRsuiteCssLoader)

// We're hiding the form panel because it's not fully functional in this example
const customization = {
  Forms_Tab: {
    hidden: true
  }
}

// &new>
const toFormEngineValidate = (yupValidator: typeof Schema.prototype) => async (value: unknown): Promise<RuleValidatorResult> => {
  let err: RuleValidatorResult = true
  try {
    await yupValidator.validate(value)
  } catch (e) {
    err = (e as Error).message
  }
  return err
}

const customValidators: Validators = {
  'string': {
    'isFullName': {
      validate: toFormEngineValidate(validator.fullName)
    },
  },
  'date': {
    'dateInTheFuture': {
      validate: toFormEngineValidate(validator.dateTodayOrInTheFuture)
    }
  },
  'number': {
    'checkGuestCount': {
      validate: toFormEngineValidate(validator.checkGuestsCount)
    }
  }
}

// <&new
function App() {
  const [formik] = useBookingForm()

  const setFormikValues = useMemo(() => debounce(async (form: IFormData) => {
    const {fields} = form as ComponentData

// &chg>
    for (const [key, {value, error}] of fields) {
// <&chg
      const field = formik.getFieldProps(key)
      if (value !== field.value) {
        try {
          await formik.setFieldValue(key, value)
// &chg>
          formik.setFieldError(key, error)
// <&chg
        } catch (e) {
          console.warn(e)
        }
      }
    }
  }, 400), [formik])

  return <FormBuilder
    // &new>
    validators={customValidators}
    // <&new
    view={builderView}
    customization={customization}
    formStorage={formStorage}
    initialData={formik.values}
    onFormDataChange={setFormikValues}
    getForm={loadForm}
    actions={{
      submitForm: ActionDefinition.functionalAction(async (e) => {
// &chg>
        await e.store.formData.validate()

        if (Object.keys(e.store.formData.errors).length < 1) {
          await formik.submitForm()
// <&chg
        }
      }),
    }}
  />
}

export default App
You can now add validators to fields on the form, full JSON form below. FormEngine validators No need for embedded inline form validators, so drop them.
useBookingForm.ts
// ...

export const useBookingForm = (): [FormikProps<BookingForm>, BookingForm] => {
// ...
  const formik = useFormik<BookingForm>({
    initialValues,
// &del>
    validate: ({checkinDate, fullName, guestCount}) => {
      let errors: Partial<Record<keyof typeof initialValues, string>> = {};

      if (!fullName) {
        errors.fullName = 'Name is required.';
      } else if (fullName.trim().split(' ').length < 2) {
        errors.fullName = 'Please enter a full name.'
      }

      if (!checkinDate) {
        errors.checkinDate = 'Date is required.';
      }

      if (!isFinite(guestCount as number) || (guestCount as number) < 1) {
        errors.guestCount = 'No guest entered.';
      }

      return errors;
    },
// <&del
    onSubmit: (data) => {
If you fill out the form, you will see that it is now processed by separate Yup validators. Yup validators

Conclusion

By integrating FormEngine with Formik, you can create powerful, user-friendly forms in your React applications. This combination allows you to leverage the strengths of both libraries, ensuring efficient form management and validation. With the steps outlined in this guide, you can easily sync data and validation errors between FormEngine and Formik, enhancing your development experience. For the complete source code and additional examples, visit our public GitHub repository. Start building better forms today with FormEngine and Formik!
Last modified on April 16, 2026